Top Tips for Shooting Stop-Motion Animation Video
DSLR Video Tips - Stop Motion Animation (3:43 minutes)
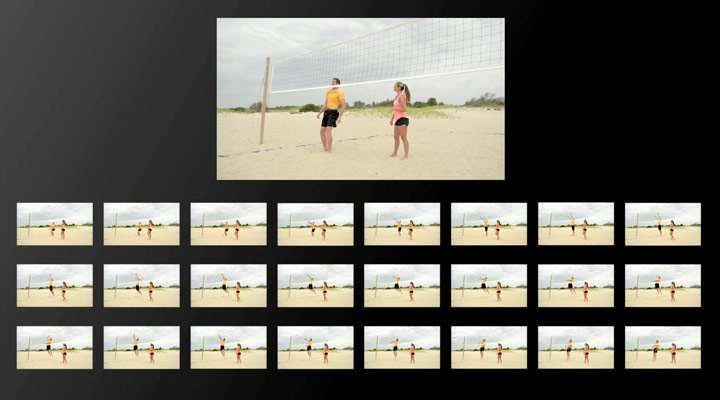
Stop-Motion is similar to Time Lapse in that you’re taking a series of single images at a certain interval, but instead of shooting something that’s moving on its own, like clouds in a Time Lapse, you’re moving the subject itself and animating it.
When you shoot a standard movie, you’re actually shooting a series of still images that are playing back at a fast rate. If you’re shooting a movie at 24 frames per second, for instance, your camera is actually shooting 24 different images every second.
Well, in Stop Motion photography you’re doing the same thing, but instead of shooting all those frames in real time, you’re shooting one image, then moving the subject, shooting another image, moving the subject again, and so on. The motion comes together when all those images are edited into a continuous movie.
Stop-Motion Tips $
-
Set up the camera on a sturdy tripod so that the camera doesn’t move during the entire shooting process.
-
Frame up the shot so that you can see the subject(s), and lock the tripod down firmly.
-
Because you don’t want the exposure or focus to change, set them both manually.
-
Use controlled, constant lighting. You wouldn't want to use daylight because the angle of the light might change while shooting.
-
If your camera has a Vari-angle display, swing it out so that you can see it easily or use an optional third-party accessory monitor.
-
To make sure the camera doesn’t move when you press the shutter button, use a remote or release such as the Nikon ML-L3 which is an Infrared trigger; or the WR-R10/WR-T10 and WR-1 which is wireless, and uses radio frequencies to trigger the shutter. Nikon also makes hardwired remotes that you can use as well. View Nikon's remotes and releases here. All of these are optional items that are sold separately (check your camera's User's Manual to see which are compatible with your camera).
Calculating the Frames Needed for the Final Movie
Before you start shooting, you’ll need to do a little math in order to calculate the timing of your stop-motion moves.
If the final movie is playing back at 24 frames per second, every 24 images shot will equal one second of the movie. So if you want your little movie to be 3 seconds long, it’ll require 72 individual images and 72 moves of the subjects to complete the action.
Start in the first position, shoot a frame, move the subject(s) you’ve determined need to be moved, shoot another frame, move the subject(s) again, and keep on going until you’ve finished shooting all 72 frames.
Once this is done, you’ll need to bring the images into an optional third-party editing program designed for the creation of stop motion movies to sequence them together.
If you really want to get serious about your Stop Motion projects, you can invest in software packages that give you more sophisticated control of the entire animation process.
Remember to check your DSLR camera’s User’s Manual for instructions on its particular menu navigation and dial layout.


