The importance of Picture Controls
Many people pick up their camera and only worry about the shutter speed, aperture and ISO when it comes to creating a photo. But getting a properly exposed photo is just part of the equation, there’s a whole other aspect that needs to be addressed as well; how the photo will be edited.
If you’re shooting RAW (Nikon NEF) then you plan on editing the file afterwards on the computer, but videographers and still photographers who shoot in JPEG often expect the file coming out of the camera to be pretty much finished. For these types of shooters, the Picture Control that’s selected can have a major impact on the final image. Even if you shoot RAW and plan on processing your image afterwards, don’t think that there aren’t benefits to using Picture Controls directly in-camera. Picture Controls can benefit even RAW shooters.
First off, Picture Controls are preset profiles that are designed to optimize things like contrast, clarity, brightness and saturation for different scenes. For JPEG or video shooters in particular, picking the right Picture Control can be critical, as these options will be “baked” into the file once you take the shot.
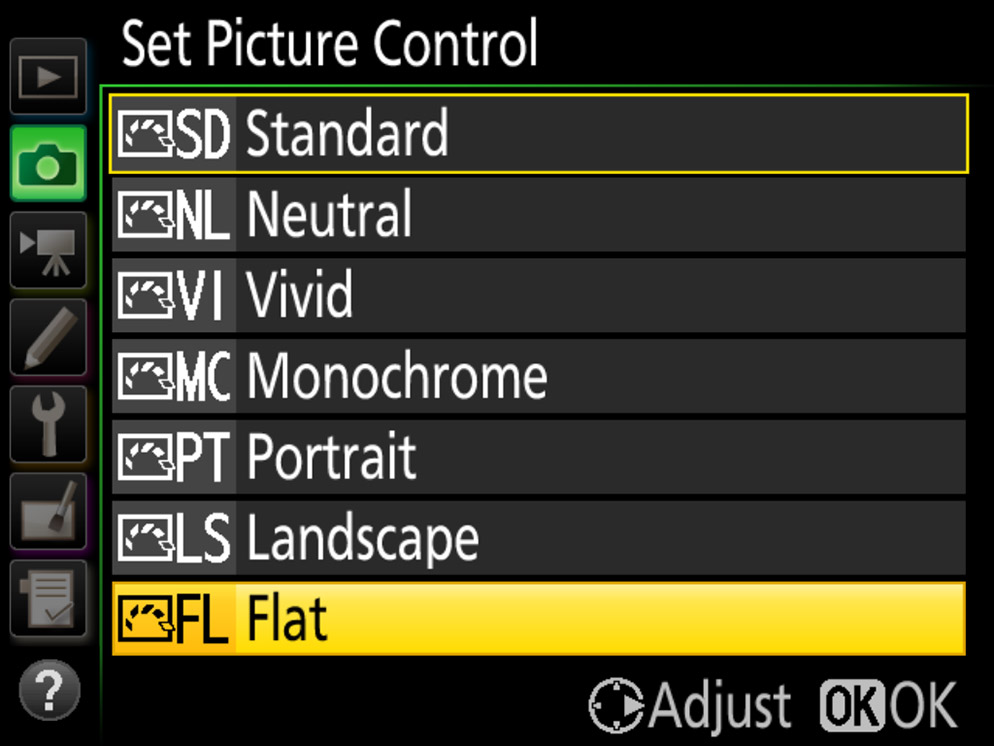
The built-in preset Picture Controls in current Nikon DSLRs are: Standard, Neutral, Vivid, Monochrome, Portrait, Landscape and Flat.
You get all of these on Nikon’s mirrorless Z system cameras and an additional batch of 20 Creative Picture Controls added.
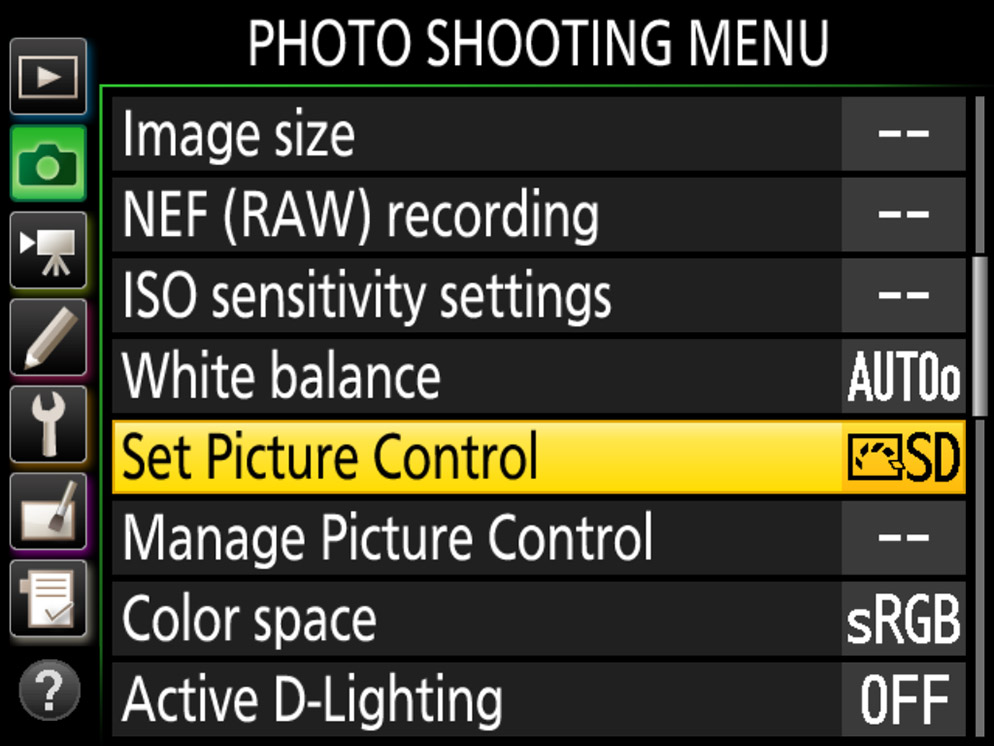
The selector for Picture Controls is found in the shooting menu on the camera.
Select from a variety of Picture Control options.
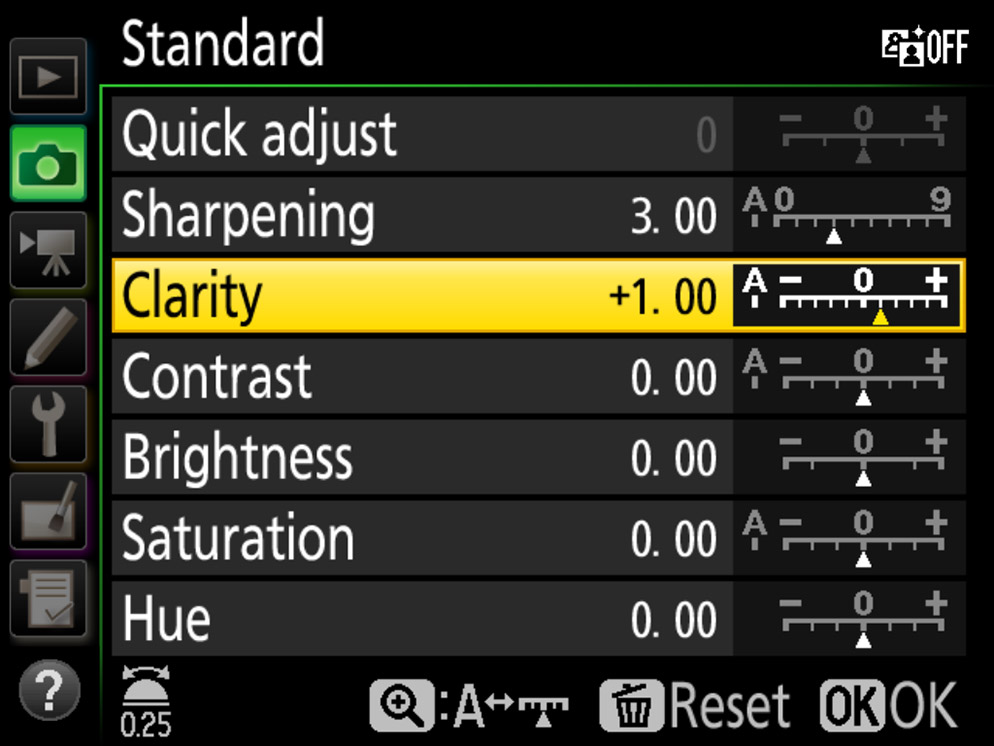
Let’s say you really like how Standard renders your photos but you want them to have a little bit more sharpening applied to them. Well you can also easily make adjustments to each of the profiles just by clicking right on the multi-selector when you have that Picture Control highlighted.
Adjustments can be made to Quick Adjust, Sharpening, Clarity, Contrast, Brightness, Saturation and Hue.
You can change not only the Picture Control itself but you can also make adjustments within each Picture Control.
In camera, you can adjust a variety of settings within the Picture Control you've selected.
Differences between the different Picture Controls:
-
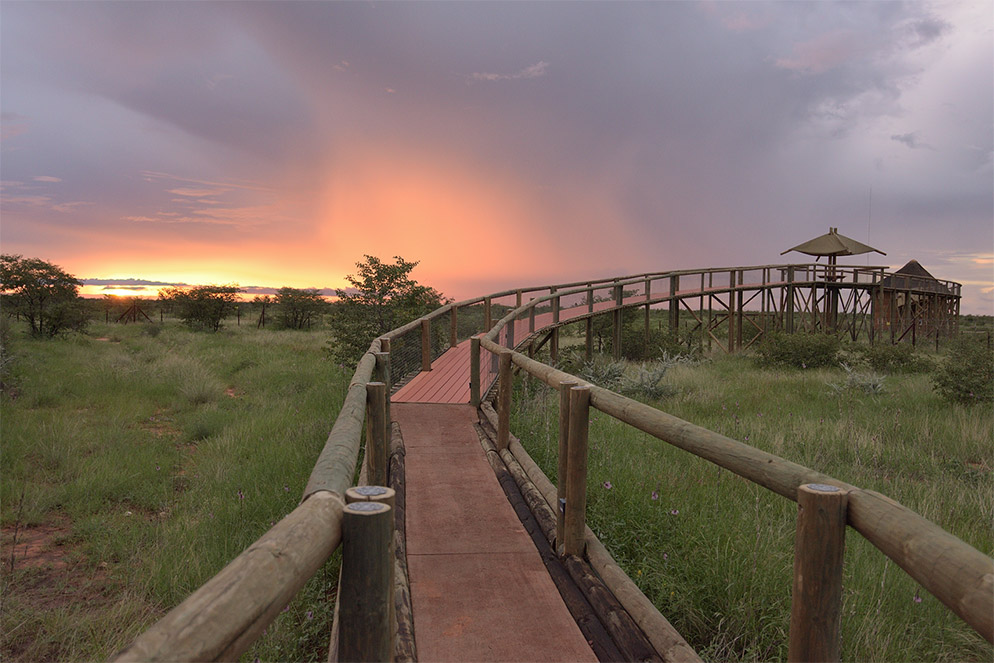
Starting with Flat, notice there’s very little contrast, and the saturation is quite low as well. This is a popular profile for video shooters who later want to color grade their footage.
-
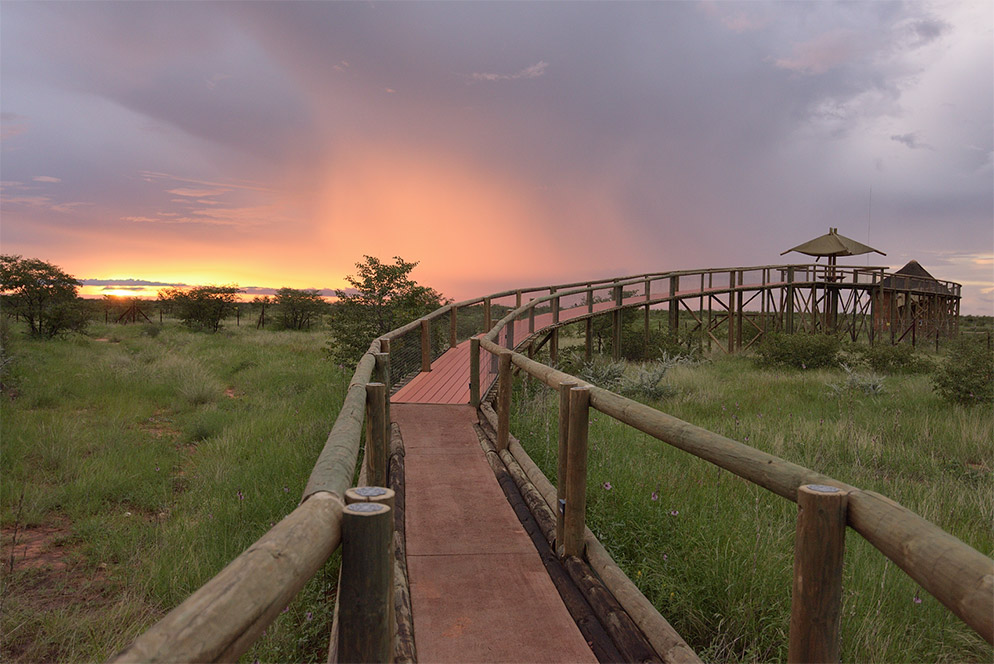
Next is Neutral, which attempts to deliver images that are close to the original scene’s color and gradation
-
Portrait uses the same base as the Neutral profile but helps skin tones look more lifelike. Even without people in the scene, Portrait helps bring up shadow detail while providing a bit more pop in color.
-
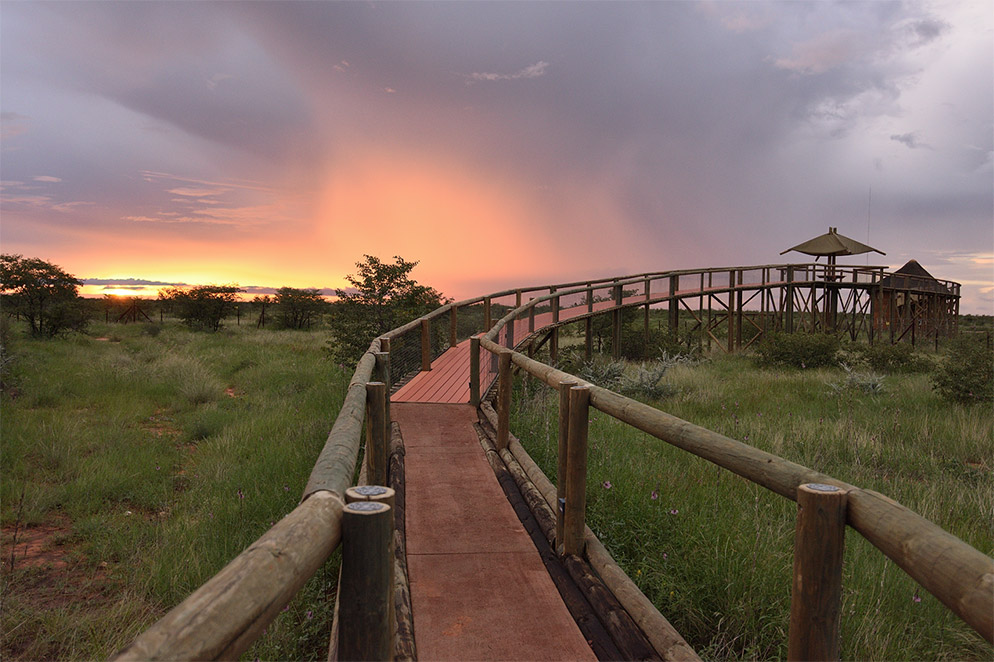
Standard is a popular choice because it makes for well-balanced images that have a little bit more punch to them.
-
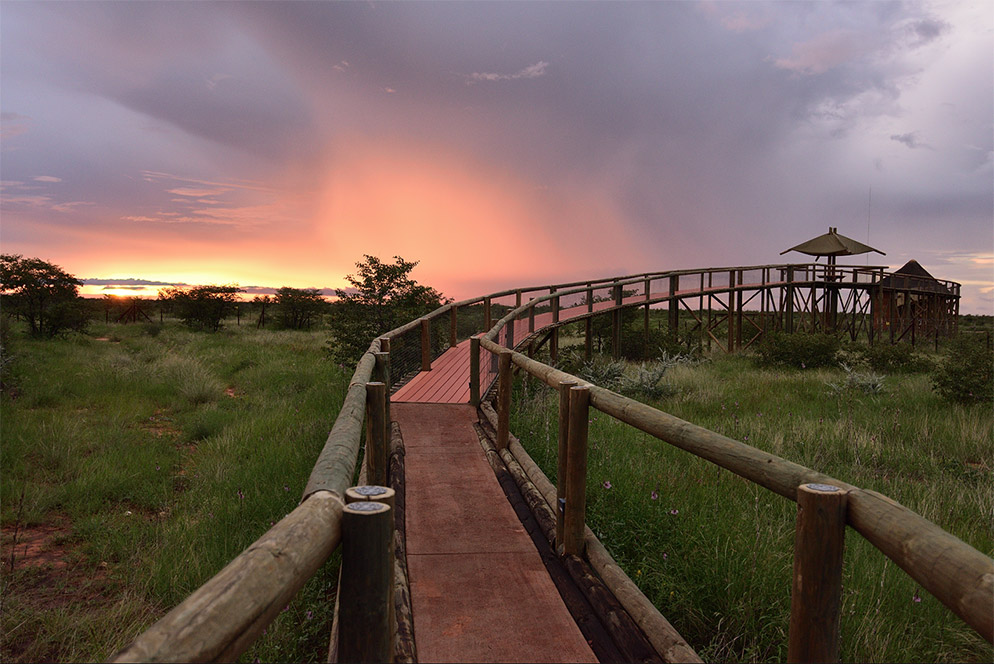
Vivid is great when you really want to put emphasis on your subject’s contrast and saturation
-
Landscape produces a more intense file than Standard, but is slightly toned down when compared with Vivid.
-
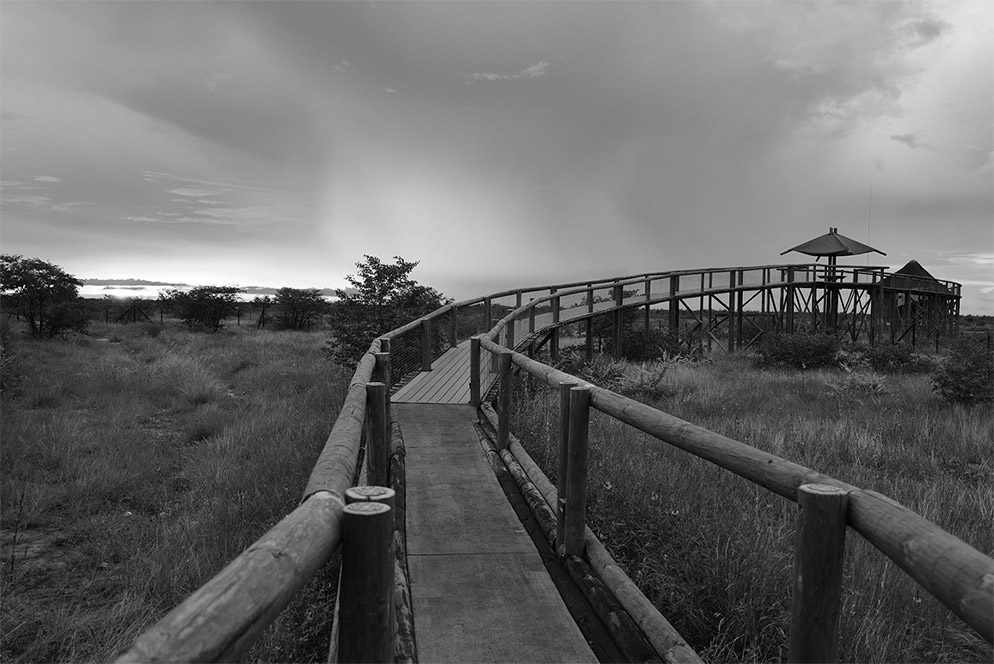
And obviously Monochrome creates a black and white version of your photo.
Flat Picture Control
Neutral Picture Control
Portrait Picture Control
Standard Picture Control
Vivid Picture Control
Landscape Picture Control
Monochrome Picture Control
Custom Picture Controls
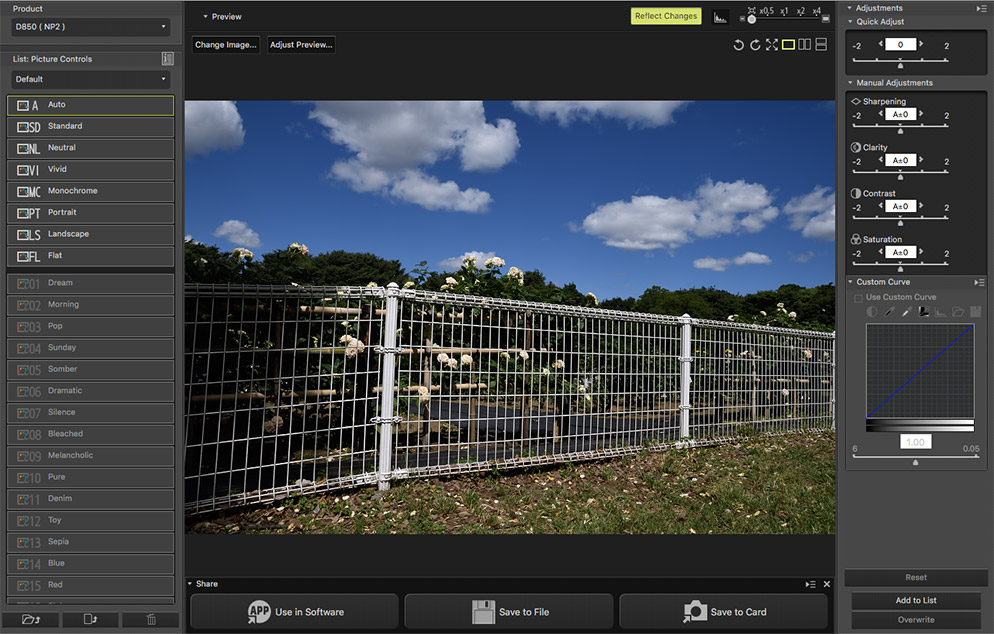
While you are able to make small adjustments to the default Picture Control profiles, what do you do if you have a specific look or editing style that you always want applied to your photos? In that case, you can create your own custom Picture Control. To do this you’ll need to download Nikon’s free Picture Control Utility 2 software that works on Mac or Windows-based PC’s. Once it’s downloaded, you have the option of customizing the look of that edit through:
-
Sharpening
-
Clarity
-
Contrast
-
Saturation
-
As well as adding a Custom Curve
Picture Control Utility software from Nikon.
Once you’ve made your changes to the profile, you can press the Save to Card button and that will now save this custom profile to a memory card that you've got plugged into the computer. Once it’s saved, remove the memory card, place it in your camera and go to Manage Picture Control in the Shooting Menu. Go down to Load/Save and select the new Picture Control that you created. Now whether you’re shooting stills or videos you have access to this custom profile, which as you can see, can provide a powerful editing tool when you’re in the field and may not have access to a computer.
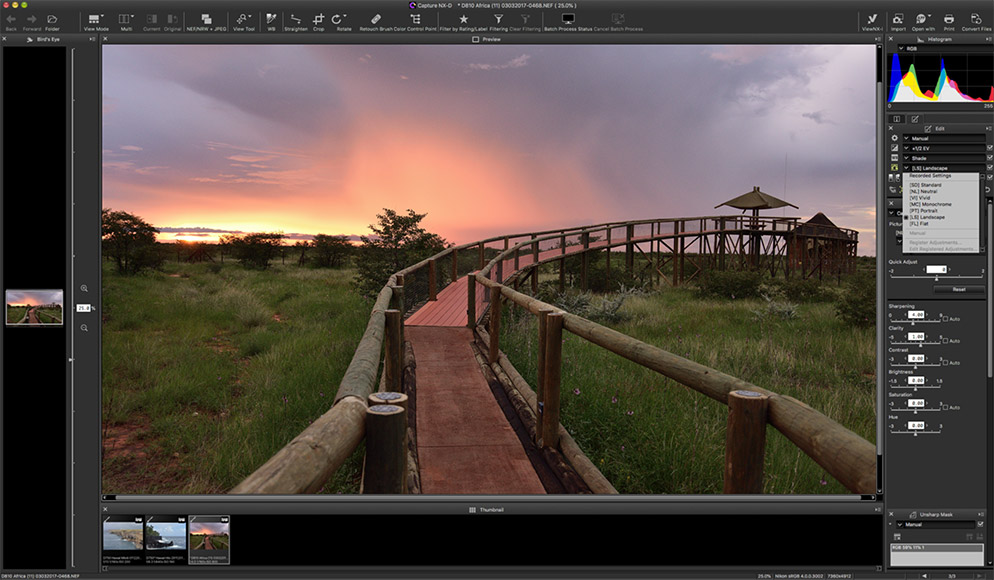
So, what if you shoot RAW and never utilize the video capabilities of your Nikon camera, how can you benefit from Picture Controls? Well if you use Nikon’s View NX-I and Capture NX-D software, they utilize all the settings in your camera such as vignette control, distortion control, Active D-Lighting, and of course it perfectly reads the Picture Controls in RAW. That means when you edit your files using Capture NX-D, not only is the exact file you saw on the back of the camera ready in the software, keeping your workflow consistent, but you can non-destructively see how a completely different picture control would look.
For instance, if you shot the image in-camera with a Neutral Picture Control, and want to change it after the fact to Vivid or another Picture Control easily.
Capture NX-D software from Nikon. Notice the drop-down box on the right that lets you choose which Picture Control you want after you’ve already taken the shot.
In-Camera RAW Processing
With nearly every Nikon camera now having built-in Wi-Fi, it’s becoming more and more common for everyone to instantly share high-quality photos from their Nikon camera on Facebook, Instagram, or other social media platforms.
In the past, many RAW shooters wouldn’t really maximize this feature, assuming they need a computer to properly edit their files, but thanks to the in-camera raw processing that’s built into nearly every Nikon camera, that isn’t the case.
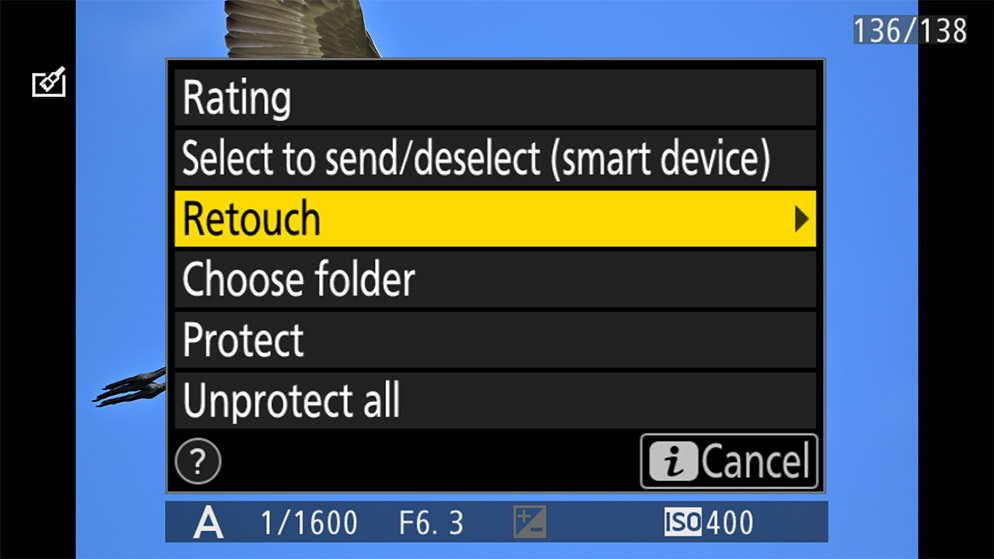
By using the ‘i’ button when in playback mode, and selecting, RETOUCH PHOTO and then RAW PROCESSING, you have access to many different editing options, Picture Control being just one of them.
Select cameras allow you to retouch not only one image in camera, but to batch process multiple files as well.
This is a great opportunity for RAW shooters to now be able to edit their files in-camera, ensuring they get the colors and look that they want before sharing it with the world.
And, on newer Nikon cameras if you have multiple images that you want edited you can even select BATCH processing and do them all at once. When you combine all of this together, especially when using custom Picture Controls, this gives a RAW shooter the ability to get a final looking image that’s ready to be shared, all without the need of a computer. When on a long trip this can become an indispensable feature.
So, whether you shoot JPEG, RAW or even video, there are lots of reasons to consider using Picture Controls to enhance your final image or video!


