Summer Photography From Dawn to Dusk
Summer days are longer, the light is stronger. No matter the hour, it’s prime time to be outdoors taking pictures. The sunlight’s intensity, direction and color change over the course of the day. Learn how to work with light, and its subtle color changes throughout the day, and you will enjoy photo-taking from dawn to dark.
Nikon DSLR at Peak Performance
For pointers on how to take the best photos no matter the time of day, we spoke with Nikon Ambassador Dave Black. His enviable acuity for reading and understanding the color of light is spot-on. A freelance photographer for more than 30 years, his work has appeared in Sports Illustrated, Time, Newsweek and other outlets. You have likely seen his Lightpainting work—Black was among the first to gain global attention for the after dark art he creates using Nikon Speedlights and handheld spotlights.
A get-it-right in the camera proponent, his photography tips and tricks are both quality improvers and time savers. We take five favorite images from his archive and travel the world in a single day.
Sunrise on a Golden Coastline
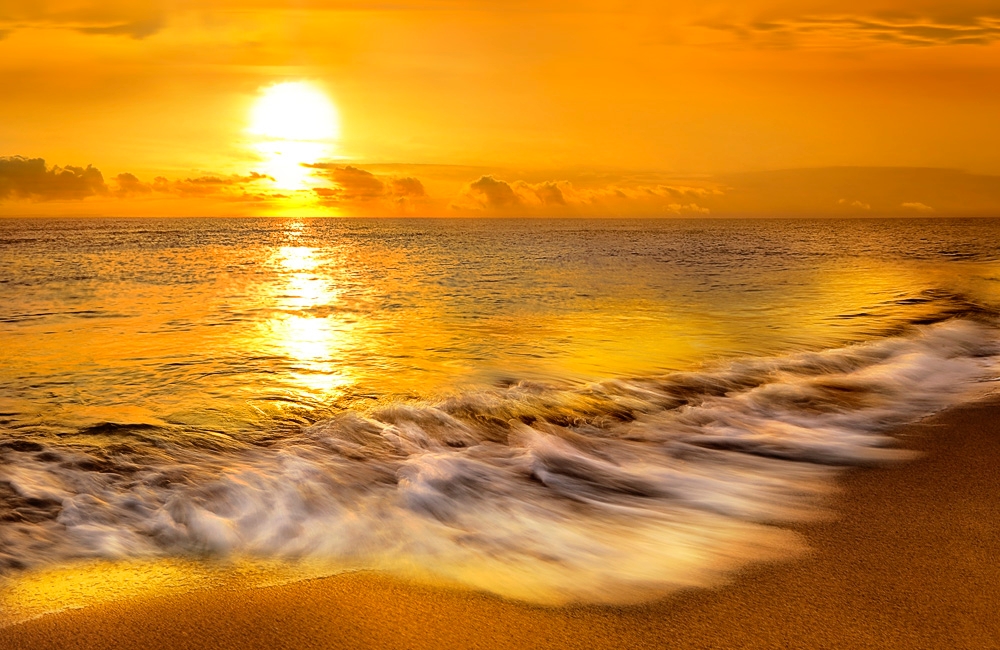
The essence of an early morning coastline, with its “larger than life sun” and dreamy blur of soft ocean waves, is easily captured by Black. From the eastern side of the Florida Gold Coast, Black worked with the AF-S NIKKOR 24-70mm f/2.8G ED and his camera set on a tripod. “This spot is known for its golden light and wide open beaches, so it was a natural to play up warm tones. I also chose to bathe the scene in serenity by making the waves look calm and inviting.”
“This spot is known for its golden light and wide open beaches”.
Photo Tip #1:
If you don’t have ND filters with you try using a circular polarizer; it can reduce exposure by as much as two stops. If you don’t have any filters, shoot just before the sun emerges or wait until the sun is higher in the sky and be careful to meter from an area of the sky that isn’t as bright as the sun. You can also compose with the sun cropped out of the shot.With coloration an initial consideration, Black amped the in-camera temperature setting to 10,000 degrees Kelvin; this brought an even more overall golden cast. To get that smooth soft blur on a deep expanse of water, he picked a long exposure of 1/6 second with an f/22 depth of field. Black timed capture to position the sun just as it graced the horizon—yielding perspective play that makes the sun look immense.
Photo Tip #2:
Using the Manual White Balance (WB) Kelvin scale is a great way to create enhanced perception and mood in a picture. The Kelvin setting of 5000 is Daylight, which makes a white subject perfectly white. Kelvin numbers higher than 5000 make the image warmer, as if adding yellow-red tones to the image. Kelvin numbers below 5000 make the image cooler, as if adding blue tones. You can use Live View to preview color changes by simply viewing the camera’s LCD screen while scrolling through the Kelvin scale.
“I set the lens to 24mm and added two filters: a 10-stop neutral density (ND) filter and a 3-stop soft graduated neutral density filter. Because I was shooting in the direction of the sun, the 10-stop neutral density filter helped dial-down or neutralize a powerful source as it began to illuminate a dark environment. Without a 10-stop filter I would have gotten an underexposed image with the sun being the dominant subject. Addition of the 3-stop graduated ND filter helped equalize the golds in the sun and the sand, bringing a more harmonious range of tones.”
Peering Through Cool Morning Fog and Mist
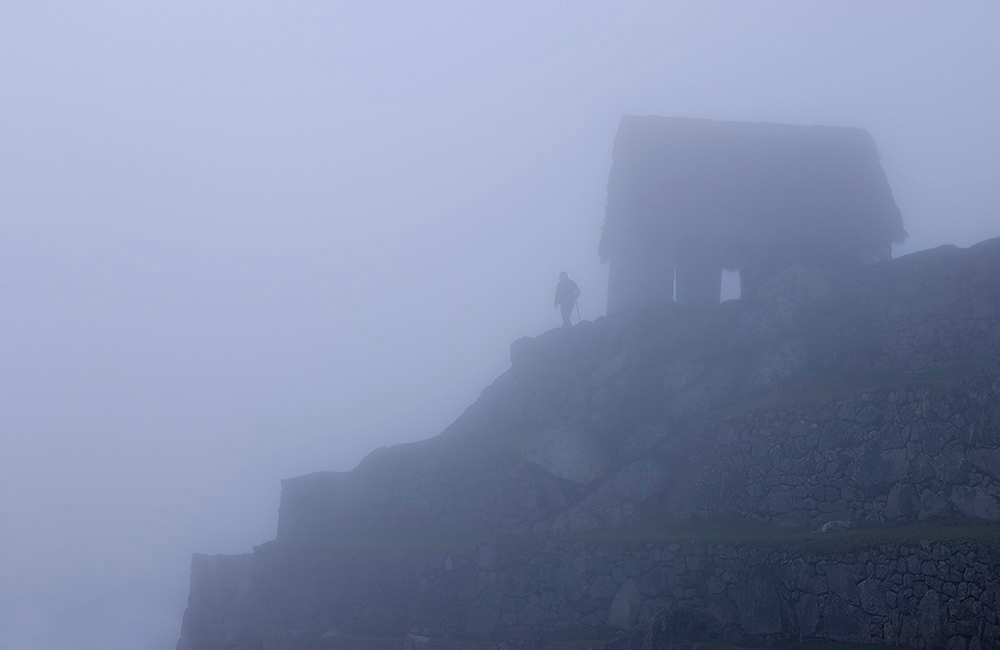
“I wanted to capture a different picture of Machu Picchu; so many images of that city look similar.” Ever feel that it’s a challenge to come up with a shot that’s not been done to death—especially when framing popular subject matter and/or destinations? Black offers a suggestion: “go out empty.” Keep an open mind. By going out empty you are free to add your interpretation to a scene without being influenced by what others have created.
“I wanted to capture a different picture of Machu Picchu; so many images of that city look similar.”
The thick fog was providing variety, but its denseness enshrouded most of the detail. Black points out that while looking over the entire scene he soon saw how his unique and useable photograph was lining up: a hiker was slowly approaching and would become a silhouette against the mist. Making the most of that dew, Black heightened the coolness of the fog by using Manual WB setting of 4000 degrees Kelvin. A 100 ISO was determined, with f/11 and shutter speed of 1/20 second.
Photo Tip #3:
When taking pictures throughout the day, try different White Balance settings. The in-camera Daylight setting might produce a very accurate representation of a scene, but the Cloudy setting might reproduce a shot that’s closer to your creative vision. If you shoot in RAW (.NEF), you can always adjust to other tones or correct the WB setting in post.
Rising Above it All—Casting a Shadow with Midday Light
Very bright light, strong shadows, lots of reflection bouncing from surfaces—hallmarks of midday conditions. Become aware of these influences and find ways to style them into your photography. Mother Nature’s high noon conditions gave a strong signature to this photo of a Mexican Vaquero. Black, having climbed to a higher elevation to gain perspective, handily framed this serendipitous shot. As it turns out, rising to photograph from a higher vantage often results in better colors and details. “I like the natural color harmony with matching tones and ample texture throughout,” he effuses. “The reflected as well as overhead light plays up the shine of the bridle and saddle. It was happenstance that a large white wall was adjacent–acting as a giant reflector and adding fill light.”
Photograph from above and shadows may play a role, as they do in this photograph.
When shooting at midday from the same level as your subject you’re bound to notice regions within your frame that show an undesirable fall of light. Photograph from above and those shadows may instead play a role, as they do here. “The shadows become elements that make this image a stand-out.” Black set his White Balance to 7140K (Kelvin). He worked in Manual White Balance and Manual Exposure at ISO 200. The photo was captured using f/7.1 at 1/640 second.
Photo Tip #4:
The Kelvin scale might seem foreign at first, but through trial and error test shots a photographer’s visual memory begins to see that a warmer color (higher K numbers) or a cooler color (lower K numbers) can be influential in setting a mood for an image.
A Sunset Texture Play with Water and Reflections
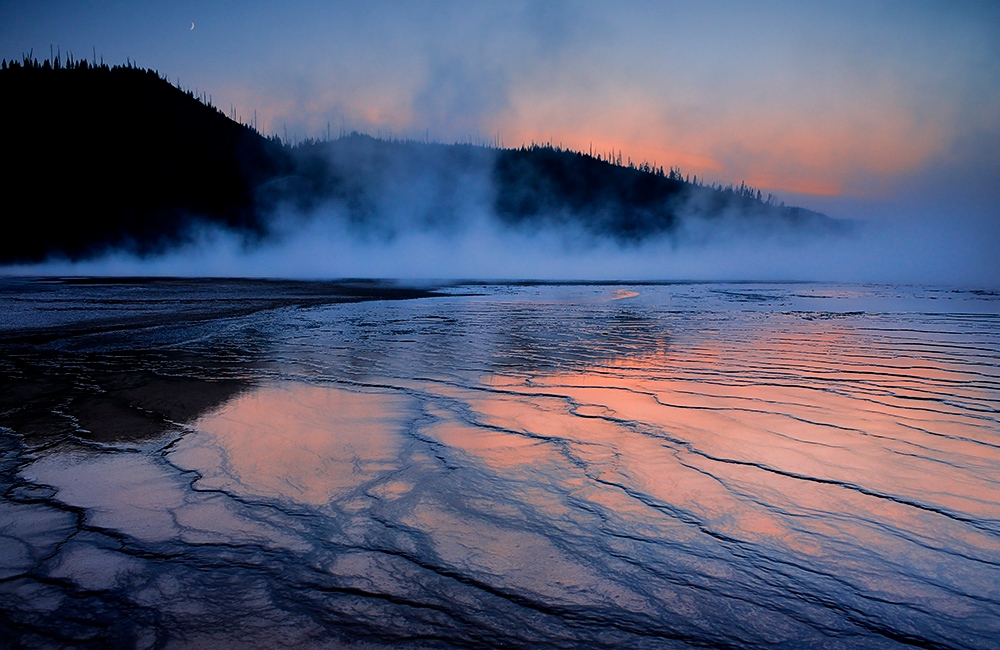
We move now to Yellowstone National Park in Montana for capture from the Nikon D800 and AF-S NIKKOR 28-300mm f/3.5-5.6G ED VR as placed on a tripod. Black was drawn to the variety of textures, tones, sloping horizon and color palette.
In general, Dave does very little post-processing, but notes that minor tweaking to exposure perfected this sunset moment.
Black likes to pair warm against cool—pink tones of a sunset against cool blues of water. Taken roughly 10 minutes after sunset, contrast and color were heightened by dialing a cooler 4000K to enhance blueness throughout while preserving pink tones. This capture finds fading light as it rims the curves of thermal pool edges. ISO 800 was selected and exposure 1/25 second. Being an expansive landscape view, a deep focal range of f/13 was chosen. In general, Black does very little post-processing, but notes that minor tweaking to exposure perfected this sunset moment.
Into the Dark with Lightpainting
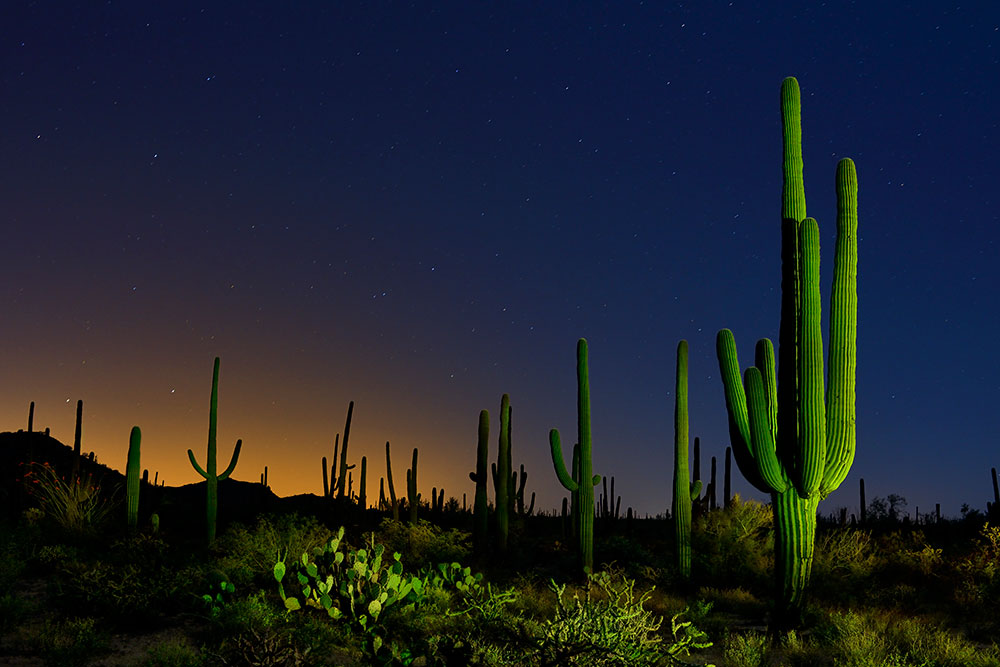
How do you make the most of prevailing conditions at night? Try placing the camera on a longer duration exposure and illuminating sections of your subject with manmade light: now you’re Lightpainting! “Looking to create that unique photograph as always, I hunted for a point of view that offered something different,” says Black. “Many viewers tell me that it looks like the sun is setting in the distance, but in fact that warm glow is coming from the city of Tucson 25 miles away.”
A 3030K preserved the blues of a night sky, but did not overpower the warmth painted in.
He created this image using the Nikon D800 and the AF-S NIKKOR 24-70mm f/2.8G ED. Settings were ISO 640 and f/6.3. Needing to walk a few paces away before capture commenced in order to Lightpaint the terrain, Black set the camera’s self-timer to 20-seconds (by moving away he can ‘carve out’ landscape texture). A 3030K preserved the blues of a night sky, but did not overpower the warmth painted in. An exposure duration of 30-seconds brought out details without showing star motion.
Photo Tip #5:
Shine your spotlight on your main subject (in this case the cactus) and bring it into focus using the camera’s Autofocus (AF). Be certain to turn off the AF before pressing the shutter release button.
“Plan on taking lots of shots to perfect your settings. I took about 20 different captures for this one before I thought I had things dialed-in. Lightpainting, as with much [in] photography, can be a trial and error affair. “
Black urges every photographer to find his or her own special way of creating and capturing. “You can enjoy photography at any time of the day when armed with the knowledge and tools. Know how to recognize and make the most of prevailing conditions. A day of photography does not have to end at sunset.”


