Landscape Astrophotography with the Nikon D810A
High ISO Performance to Reach the Stars
Combine the skills of landscape photographer, fine art printer, software engineer and nightwalker. What results is bound to be interesting. Meet Adam Woodworth, a photographer for more than 17 years.
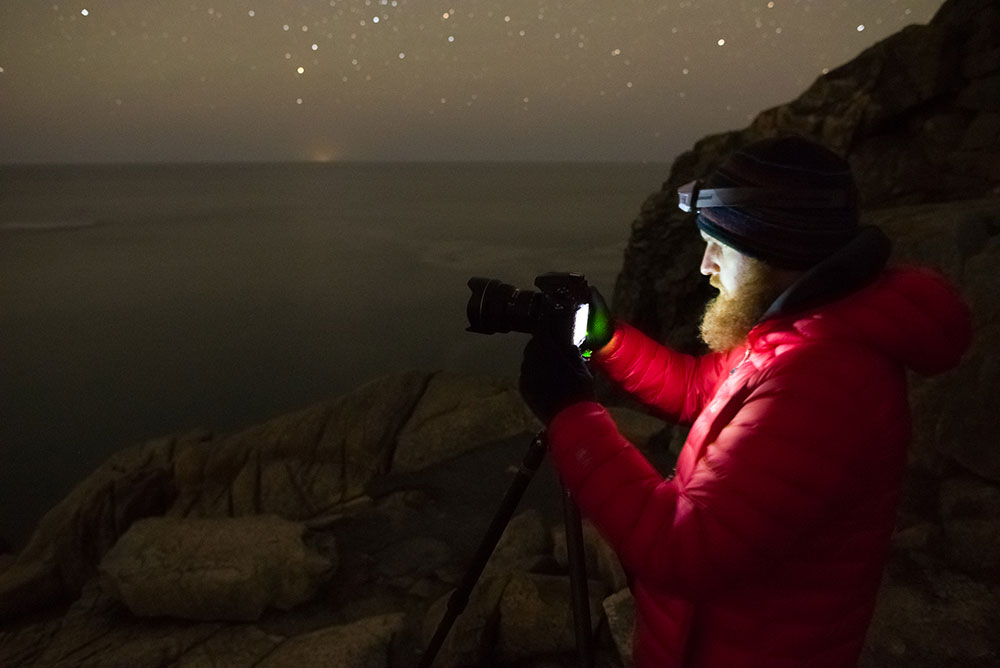
Woodworth captures the best of nature after dark—infusing it with pops of technology. Armed with a pre-production Nikon D810A, an ultra high-definition DSLR optimized for astrophotography, he hit the trails. Among his many objectives, Woodworth was interested in discovering how the camera’s special optical filter could heighten reproduction of vivid reds in images of nebulae that emit H-alpha light, but even more so he was interested in testing the incredible high ISO performance combined with a 36.3MP sensor. To pinpoint results, he shares his thoughts on the Nikon D810A and night photography.
Astrophotography Exposure Basics
Astrophotography is not just night photography. It’s a matter of dots: tiny points of light in the sky and being able to render photos with little to no star trails. There are some basics to know. For starters, you can’t stop down to f/11 in order to obtain a desired depth of field and still work a really long exposure—this would cause star trails from the rotation of the Earth (sometimes long star trails are desired for effect, but that’s not what we’re after here). Additionally, in very dark places you have very little ambient light to illuminate a foreground.
To capture pinpoint stars you must work in a very high ISO, generally ISO 3200 or greater, a bright f/stop of f/2.8 or better, and an exposure time of 30 seconds or less with a 14mm lens. Lower ISOs and/or shorter exposure times can be used in areas with lots of light pollution, or when shooting a bright aurora, or any time that the sky is bright at night, but when darkness prevails, start with the aforementioned settings.
For limiting star trails, as a rule of thumb there’s something called the “500 Rule” which says you should take your focal length (use the 35mm equivalent if using a crop sensor) and divide that into 500 to get your maximum exposure time. I find that rule results in exposures that are too long and have noticeable trails. When taking single exposures of the sky at 14mm I use 25 seconds. This creates a bright enough image with acceptable star trails.
Finding your Lucky Stars
To create those pinpoints you could use a star tracker. This device allows lower ISOs and longer exposure times, but I find that mounting the camera on a tracker makes it much harder to compose landscape shots. You also need to align the tracker to Polaris (or Sigma Octanis in the Southern Hemisphere), but you can’t always see Polaris from where you decide to compose a shot. For maximum flexibility (and minimal set-up time) I don’t use a tracker for my landscape shots.
A more complex way to get pinpoint stars and low noise in the sky is to use star stacking. This technique requires multiple very high ISO shots of the sky at a short enough exposure duration to eliminate star trails. You will end up with more noise in exposures, but by using software to stack, align and average the exposures you will obtain pinpoint stars and very low noise.
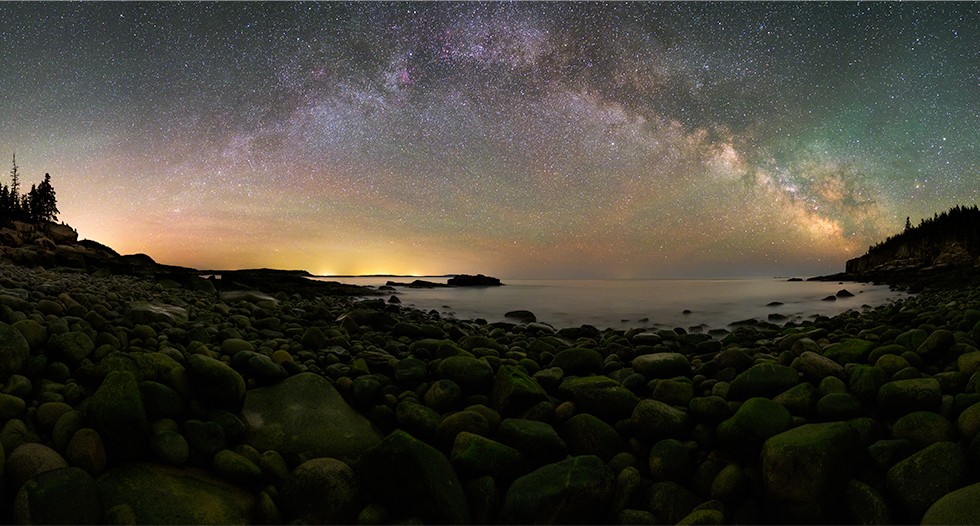
I use this method for almost all my Milky Way images that aren’t panoramas. I usually create panos using a 14mm focal length. I have the camera mounted vertically on a nodal slide that’s attached to a leveling head on my tripod. For the image taken at Boulder Beach (below), I rotated the camera 30-degrees between each shot, then took a 25-second exposure at ISO 12800. In total I took eight exposures for the sky.
Adam usually creates panos using a 14mm focal length, with the camera mounted vertically on a nodal slide that’s attached to a leveling head. Boulder Beach, Acadia National Park, ME.
When done sweeping right to left to produce my sky images, I created foreground shots by sweeping left to right in the same 30-degree increments: exposures of 120-seconds each at f/4, ISO 12800 and lens still focused at infinity. I chose f/4 because it offers more depth of field. This worked well because it made the nearby rocks more sharply in focus. Another approach would have been to reduce the ISO, perhaps to 3200. That would have yielded a cleaner foreground, with the trade-off that a much longer exposure length of 480 seconds (eight minutes) per shot would have been required. That means that the entire exposure time for the foreground would be eight minutes x eight exposures = 64 minutes; double that if you’re doing in-camera long exposure noise reduction.
Astrophotography in the Blackness of Night: Focus on Foreground
I have a few more thoughts about foreground capture. Since you’re exposing at f/2.8, and generally using ISO 3200 or higher, your foreground is likely going to be dark, have noise and be out of focus. Even if there’s plenty of ambient light to illuminate a far off foreground to acceptable focus at f/2.8, chances are your foreground will be noisy. While you may need to sacrifice noise (from a high ISO) to capture the stars, you don’t have to do this for your foreground. Take separate foreground exposures using various focus distances and exposure settings, including lower ISOs. Next, using software, blend your foreground exposures with your sky exposures to create a seamless looking picture that has an in-focus, low noise foreground and pinpoint stars.
I tend to use ISO 1600 or lower when I can, and my exposure times can vary from two minutes to 20 minutes or more depending on the ambient light. If there’s enough ambient light I can stop down to f/5.6 or higher and get more of the foreground in focus in a single shot. But if there isn’t a lot of ambient light, I take multiple exposures at f/2.8 at different focus distances.
However, when shooting panoramas, I often choose to live with the noise in a higher ISO for the foreground (see above description of Boulder Beach Panorama shot to understand why). If you’re using the Nikon D810A there’s no need to be afraid of the high ISO. The superior high ISO performance from this camera is a big benefit for landscape astrophotographers. Applying some noise reduction in your raw editor will go a long way.
Another great feature of the Nikon D810A is the new M* Manual mode that lets a photographer work in exposure times greater than 30 seconds without a remote. Options include 60, 120, 240, 300, 600 and 900 seconds. These preset durations work well for building long exposure foreground shots without a remote. For my work though I still prefer to use a remote trigger plus Mirror Lock-Up or Exposure Delay Mode setting.
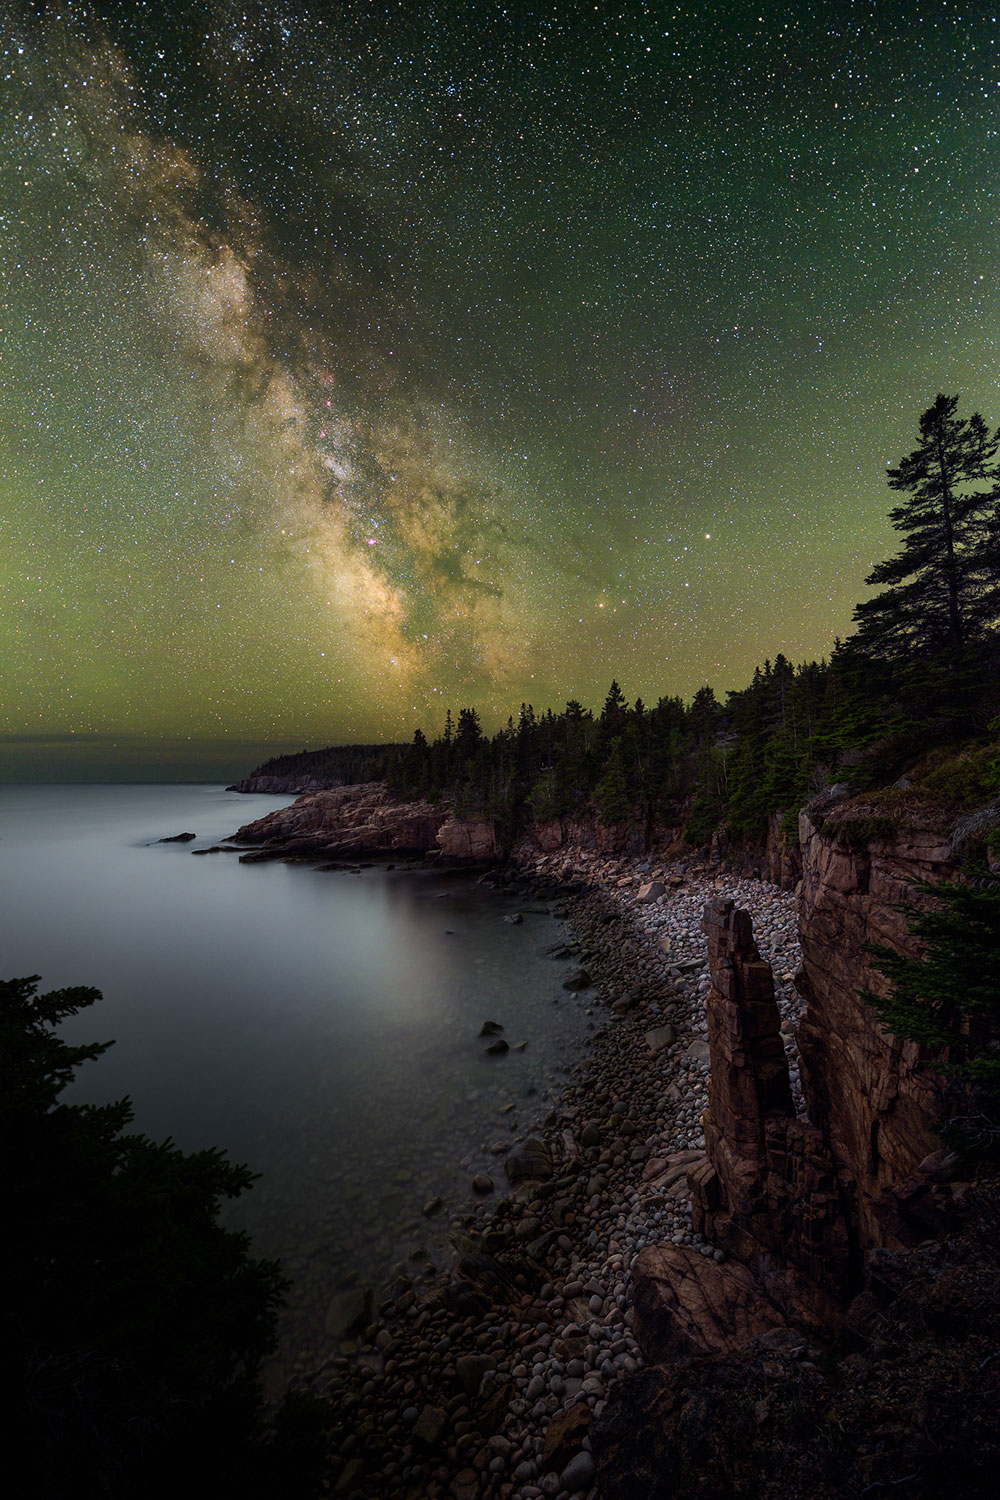
This photo has a blend of 12 exposures: 10 shots stacked for the sky and two foreground shots at different focus distances. Monument Cove, Acadia National Park, ME.
This photo (above) has a blend of 12 exposures: 10 shots stacked for the sky and two foreground shots at different focus distances. I always make one foreground exposure set to infinity so I have the horizon in focus. Sky exposures were taken at ISO 12800 for 10 seconds each. The foreground exposures were taken at ISO 1600 for 15-minutes each using different focus points. A pre-production Nikon D810A, plus an AF-S NIKKOR 14-24mm f/2.8G ED were used. Software was Starry Landscape Stacker.
Slippery When Wet
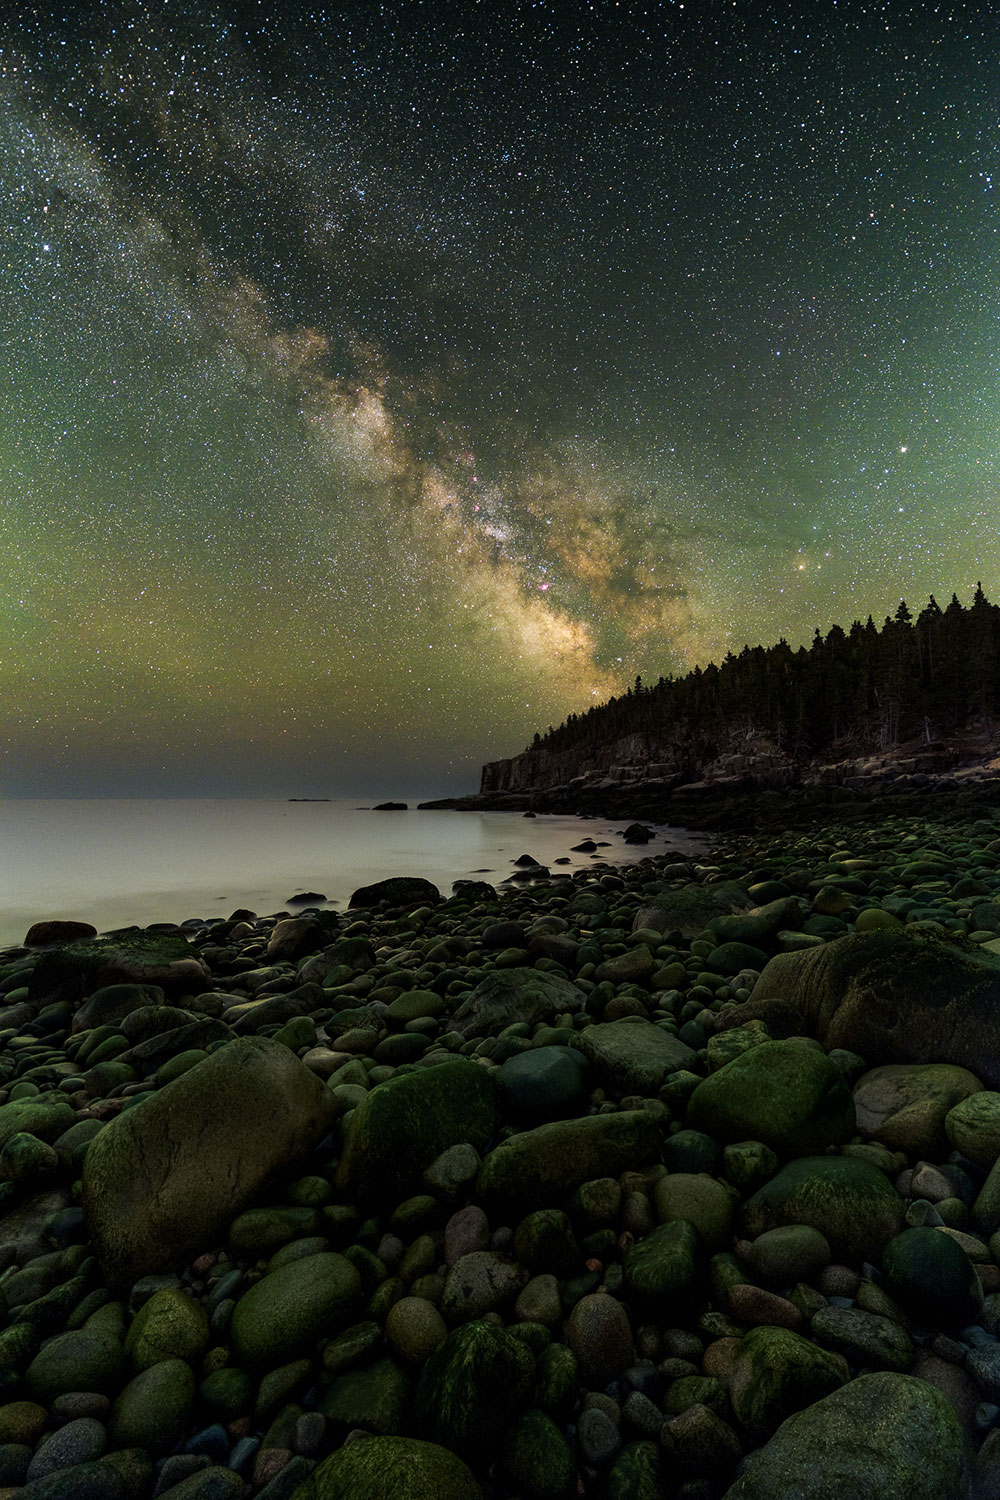
I had originally wished to frame a shot when the tide was higher, when the green seaweed-covered rocks would not be visible. I could have shot from farther up the shore where the same types of rocks were visible—minus clinging seaweed. I settled on including the covered rocks so that I could be closer to the water; I like how the green works.
My biggest challenge that night while shooting from down on the rocks was knowing how insanely slippery they were. Think navigating rocks in the dark with a pack of expensive camera gear, add slick uneven surfaces, a quest for the best composition, preserving personal balance during long exposures, plus the ability to not fall onto a tripod. I stood at that spot for roughly 40 minutes that night—not so long given my usual time spent doing an astro shot, but long enough in those conditions.
“Boulder Beach” is a blend of 13 exposures: 10 shots stacked for the sky and three foreground exposures at different focus distances. Boulder Beach, Acadia National Park, ME.
“Boulder Beach” (above) is a blend of 13 exposures: 10 shots stacked for the sky and three foreground exposures at different focus distances. Sky exposures were taken at ISO 12800 for 10 seconds each, then stacked and blended with Starry Landscape Stacker. Foreground exposures were taken at ISO 6400 for five minutes each using different focus points. Normally I would have used a lower ISO for the foreground, but I wanted to test the high ISO performance of the Nikon D810A. I again relied on the AF-S NIKKOR 14-24mm f/2.8G ED.
I usually determine where to focus with my foreground images by first taking a shot at infinity and then zooming in on the photo using the LCD on the camera. I check to see where the depth of field falls off. I then refocus the lens to wherever my next shot needs to be, then examine it to see if I need more depth of field. With experience you will learn roughly what is in focus at infinity and how many foreground exposures you may need for a given composition.
Thoughts About Pre-planning
Before I head out to a location I do as much pre-visualization and prep work as I can. I use tools such as Google maps, images of the area that I find online, plus my own personal experience if I’ve been to the spot before. The PhotoPills app for iPhone/iPad is the single most useful planning tool that I have (PlanIt! is an app with similar features available on iPhone and Android). The PhotoPills app allows me to see the angle and location of the Milky Way in relation to any spot on a 2D map, just like you would use a 2D map to plan for the location of the sun or moon. If I don’t have enough detail about the location, or the angles are hard to figure with the map, I will make sure to take note of the azimuth of the Milky Way for when it will be visible after dark, and where it will end up before daylight, and use my compass on-location to check angles.
Landscape astrophotography requires a lot of planning, patience and sometimes hand warmers, but the results are worth the effort. Don’t forget to take time to stare up at the beautiful night sky when not staring at your camera. Capture the emotion of the experience, not just the photons from the stars.
6 Tips & Tricks
-
Focusing in the Dark: To focus on the stars, put the Nikon D810A in Live View mode and scan your LCD for the stars. Rotate the focus ring close to infinity to bring stars to visibility (if the lens is far out of focus the stars will blur so much they won’t be visible in Live View). Once you find a star, zoom-in using Live View and adjust focus manually until that star is as small and sharp as possible. To focus on the foreground, use Live View in the same way but you may need the help of a flashlight to light it up.
-
Leveling the Camera: The Nikon D810A has the same Virtual Horizon level on the rear LCD as with other Nikon cameras, but this one has a red color to help preserve your night vision. Enable the Virtual Horizon to adjust your tripod/head for a level horizon.
-
Remote and Intervalometer: To take long exposures of the foreground (more than 30 seconds) you would normally need a remote timer and the camera set to Bulb mode. The Nikon D810A has a new M* Manual mode that allows you to select exposure times above 30 seconds. Presets include 60, 90, 120, 240, 300, 600 and 900 seconds. If you’re star stacking, use the camera’s built-in intervalometer to take 10 or more exposures of the sky without using a remote. If you enable Exposure Delay mode and gently press the shutter button you can get by without a remote to trigger the shutter.Nikon - At the heart of the image
-
Long Exposure Noise Reduction: One of the banes of night photographers is hot pixels. High ISO long exposures tend to have hot pixels that look like bright red, blue, green, white, etc., dots. You can almost completely eliminate these by enabling Long Exposure Noise Reduction. The camera will take a second exposure with the same settings (with the shutter closed) which results in a “dark frame” that should have the same, or very similar, hot pixels as the original exposure. The camera then uses the dark frame to map out the hot pixels in the RAW data. No time to wait for Long Exposure Noise Reduction? The new Astro Noise Reduction feature in Nikon Capture NX-D will remove a significant amount of hot pixels.
-
Light Painting: You can light paint your foreground so that you don’t have to take such long foreground exposures. However, this can lead to harsh shadows and very hot specular highlights on water, wet rocks, etc. I prefer to use natural ambient light as much as possible.
-
Effects of Infrared: The Nikon D810A isn’t highly sensitive to the entire Infrared spectrum, but Infrared light can still cause color shifts. Daytime photos will often have a red shift to them. At night, what you would normally see as orange colored urban light pollution will often take on a pale yellow glow. Lighthouses can also cause color casts. When shooting at West Quoddy Head Lighthouse, which emits a white light, there was a slight red cast in the glow around the light tower. This was fairly easily corrected in software.

