Caring for your Nikon 1 AW1 Waterproof Camera
Before Use
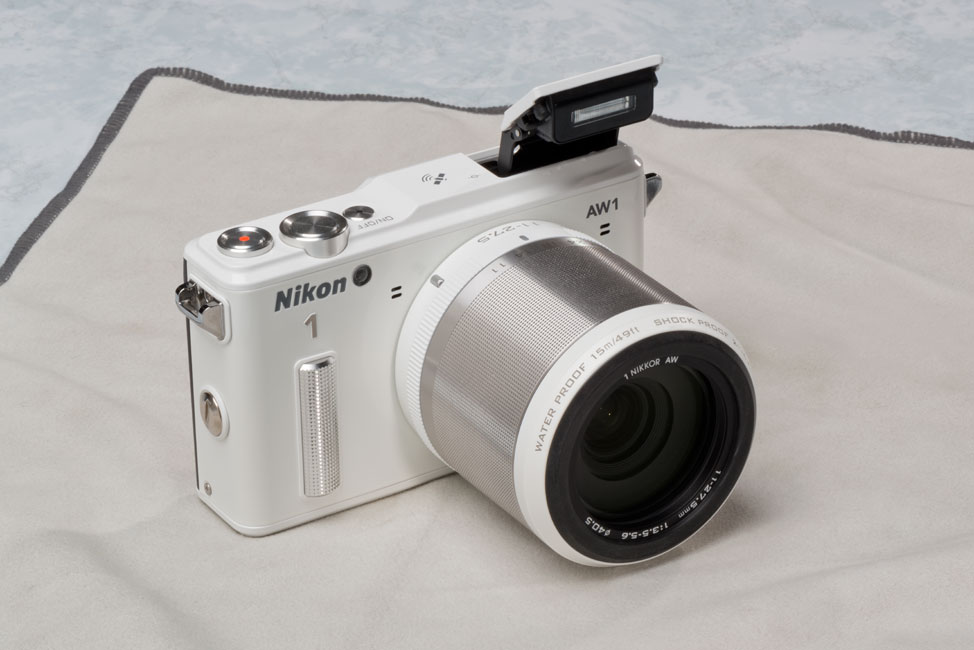
Before using the Nikon 1 AW1 waterproof camera under water, it is important that you attach a 1 NIKKOR waterproof lens onto the camera. [At the time of writing this article, there are two waterproof 1 NIKKOR lenses, a 10mm and an 11.5-27.5mm lens.]
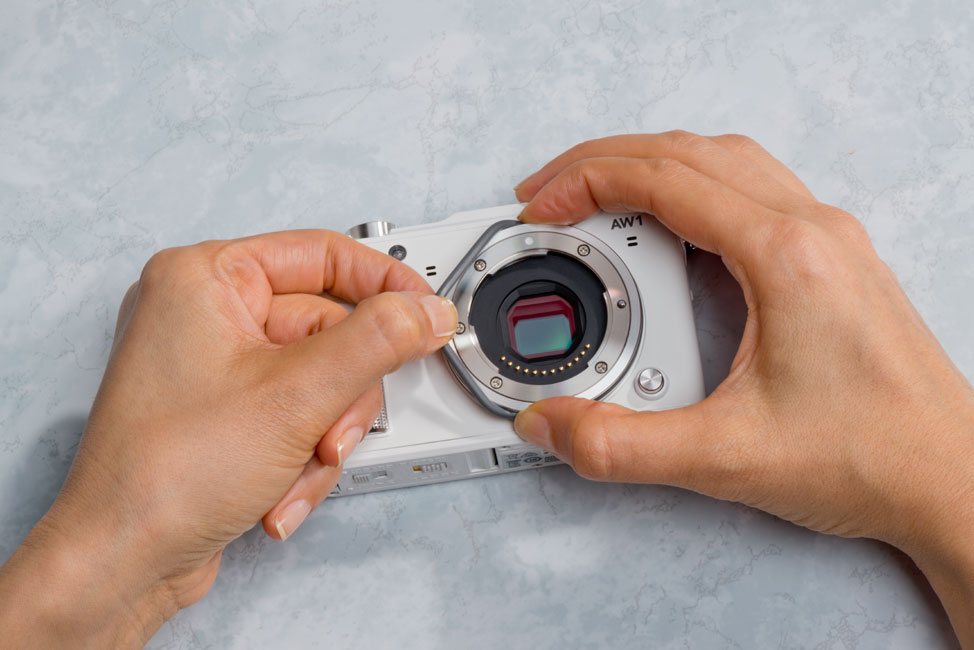
If you’ve been using the AW1 with a non-waterproof lens, or if you had the body cap on the camera, you’ll just need to inspect the O-ring before attaching the waterproof lens. Make sure there is no dirt or foreign matter on the O-ring; check that it is correctly positioned and it is not nicked or cracked. Also check the O-ring seal area of the lens to make sure there is no dust, dirt or foreign matter adhered to it. If so, clean it off.
Aligning the mounting mark on the body with the lens, carefully place the lens over the O-ring and press it into position, and then rotate the lens until it stops.
For use underwater, it is recommended that you remove the camera strap that came with the AW1 and instead use a third-party floating strap. Make sure that the battery is fully charged and inserted into the camera, and that a blank media card has also been placed in the card slot. Be careful as you’re closing the battery chamber door and the media card slot door to make sure that no foreign matter is adhering to the watertight channels. Clean any dirt with a blower or cotton swab. Make sure the latches and security locks are fully closed.
As a final check, immerse the camera with its waterproof lens attached in a sink or basin of water to make sure that you don’t see leaks. Turn the camera on and test the zoom ring and camera controls. Air may escape from the pressure-equalization vent and microphone and speaker covers, and that’s normal.
If however, you see air escaping from the lens mount or the connector and battery-chamber/media card slot covers, immediately remove the camera from the water and dry it thoroughly. Check to see that the O-ring and connector and battery chamber/media card slot covers are properly sealed. If you find the camera to be leaking during normal use, consult a Nikon-authorized service center.
If the camera passes the water submersion test, you’re ready to take it shooting under the sea or in a pool.
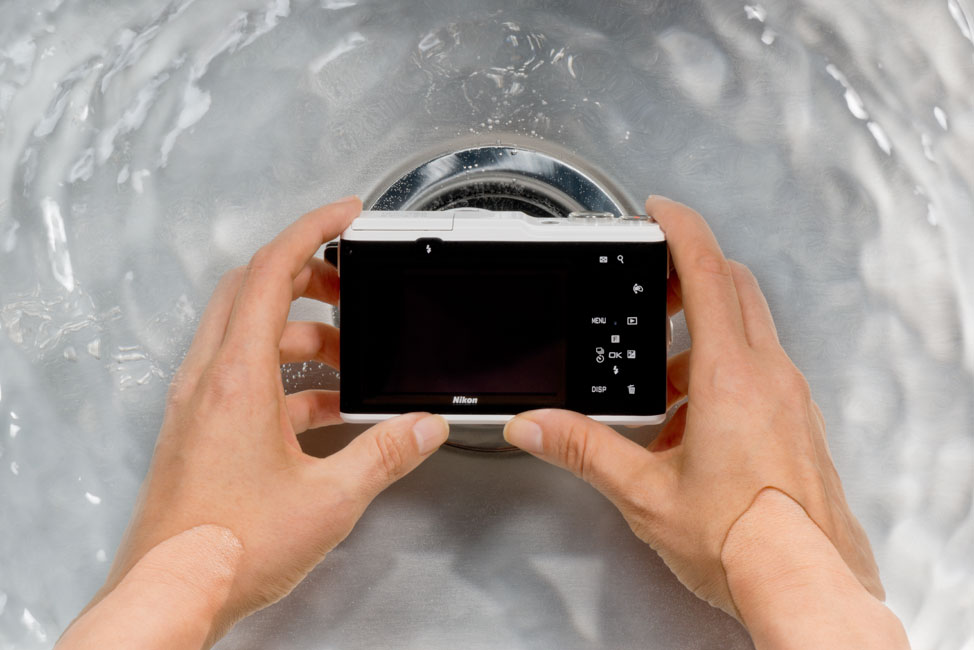
Before using the waterproof Nikon 1 AW1 and its attached waterproof lens, do a quick waterproof integrity test by placing the camera in a basin of water and looking for any escaping air bubbles. After the camera is removed from the water, dry it off and check for leaks.
|
|
After Use
Nikon recommends cleaning the AW1 within 60 minutes of underwater use. Immerse the camera in fresh water, with its waterproof 1 NIKKOR lens attached to remove salt or other foreign matter. Leave the camera/lens submerged in a basin for about 10 minutes. Press the flash pop-up button, rotate the zoom ring if you’ve got that lens attached and operate the camera’s controls while in fresh water.
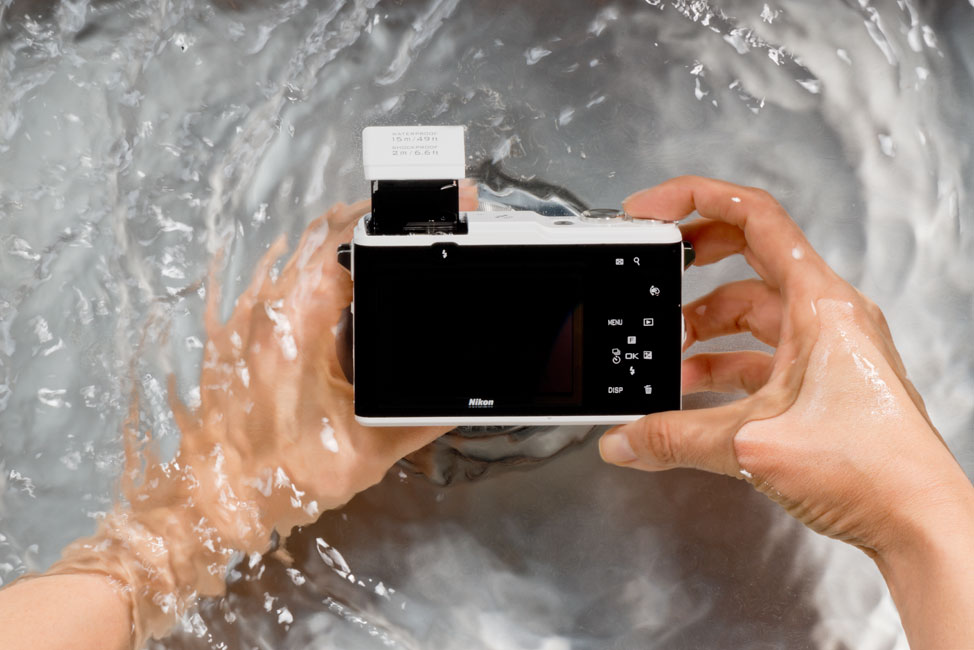
After using the Nikon 1 AW1 underwater, thoroughly rinse the camera in clean water, pressing the various buttons and extending the built-in pop-up flash to ensure that any salt or foreign matter is removed from all parts of the camera.
Wipe the camera dry. Using a soft, dry cloth, dry the camera and lens barrel.
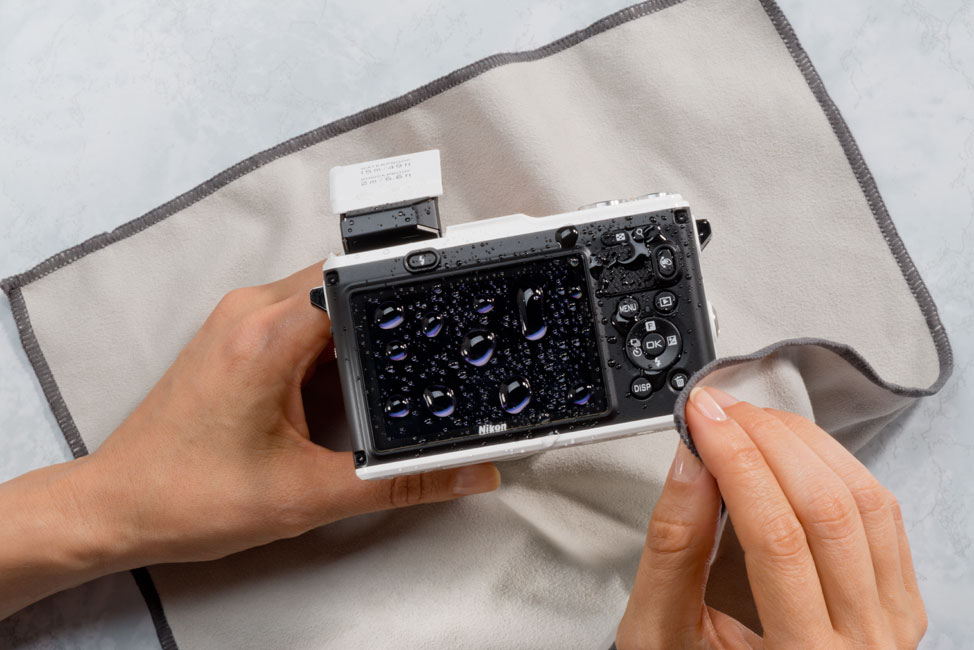
After rinsing the Nikon 1 AW1 camera, pat it dry and then let it fully air dry in a cool, shady spot.
Let the camera with lens still attached fully dry in a shady spot.
Let the camera fully air dry before you detach the lens or open the battery door or media card door.
After confirming that no more water remains on the exterior of the Nikon 1 AW1 and its attached waterproof lens, slowly open the connector and battery chamber/media card slot covers and remove any water, sand or other foreign matter using a soft, dry cloth.
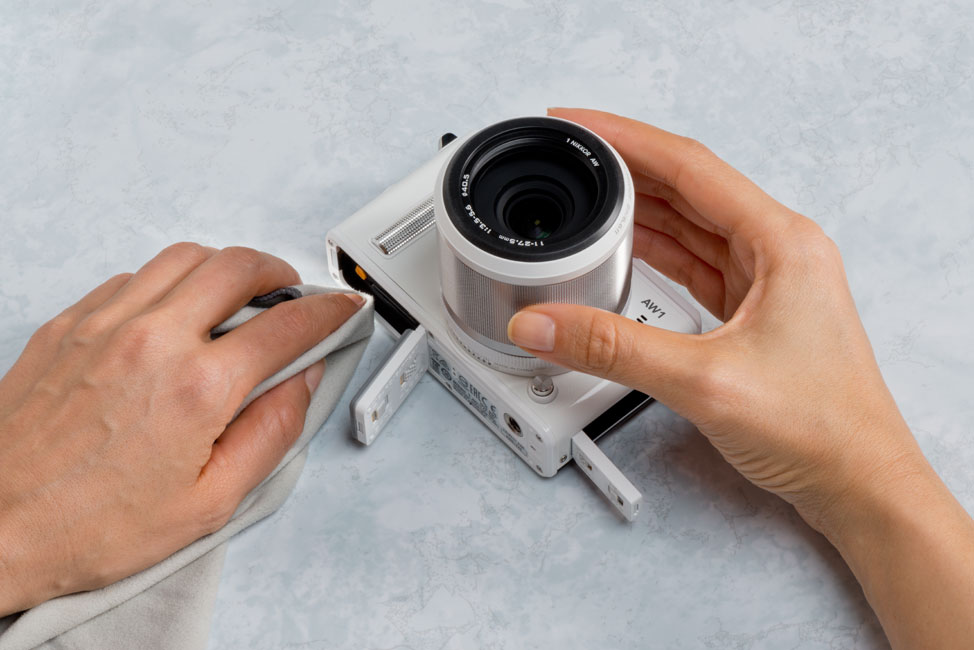
Carefully open the connector and battery compartment/media card slot door and use a soft cloth to fully dry any water that may have made its way inside.
After you’ve confirmed that the lens and camera are dry, detach the lens and gently wipe the lens O-ring seal with a soft, dry cloth to remove any foreign matter. There may still be water between the camera and lens, so keep the camera flat and remove the lens slowly and carefully.
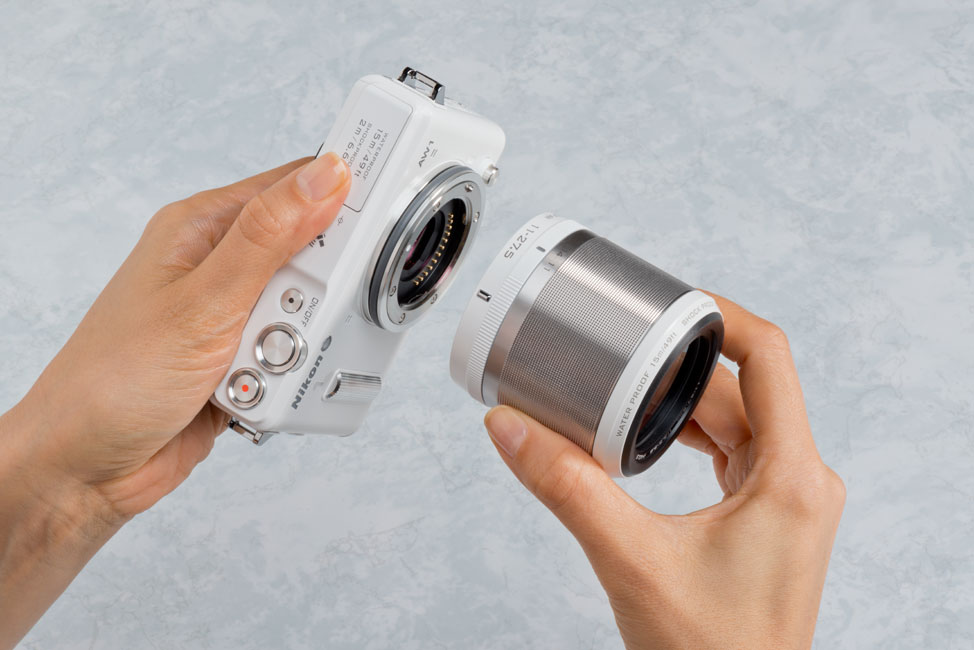
After cleaning the camera once it has been used underwater, make sure it is fully dry. Then remove the lens.
Using the soft, dry cloth, carefully clean the lens.
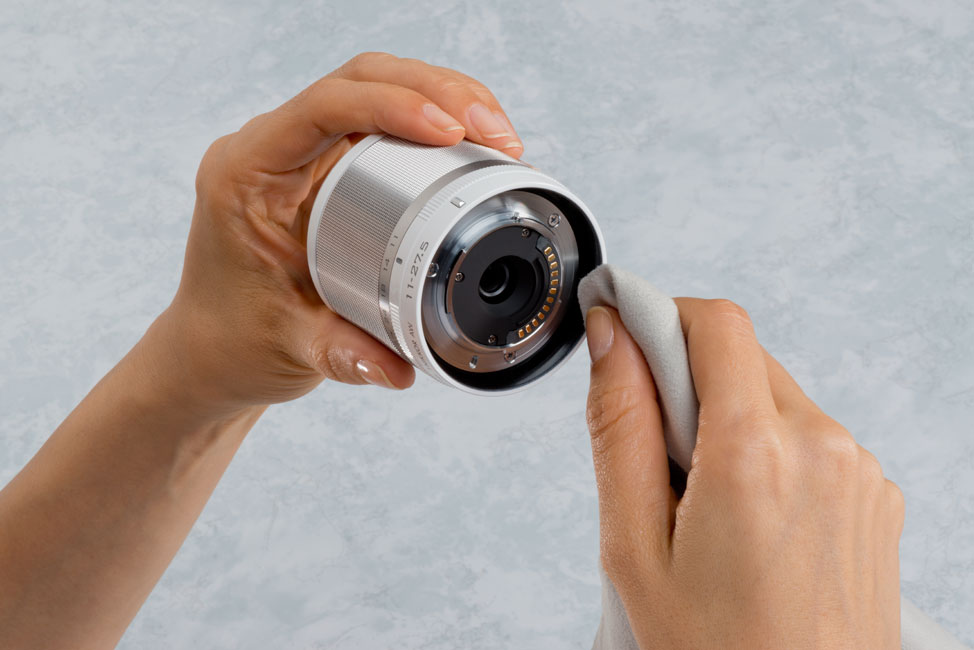
After you carefully detach the waterproof lens from the Nikon 1 AW1, use a soft cloth to fully dry the rear of the lens where it attaches to the camera.
|
|
Maintenance
Proper care and maintenance of the Nikon 1 AW1’s O-ring is important to keep the waterproof integrity of the camera and attached waterproof 1 NIKKOR lens.
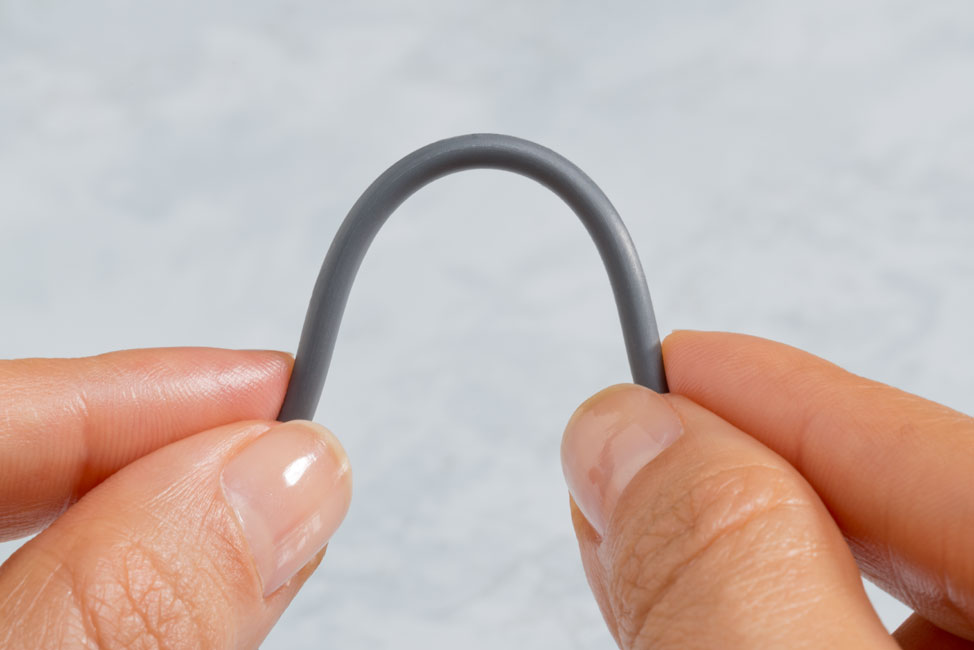
When performing routine checks and lubrication of the O-ring, you can remove it from the camera body either using your fingers or an optional O-ring remover. While holding the camera securely, lightly stretch the O-ring by sliding your fingers along either side and remove it from the camera.
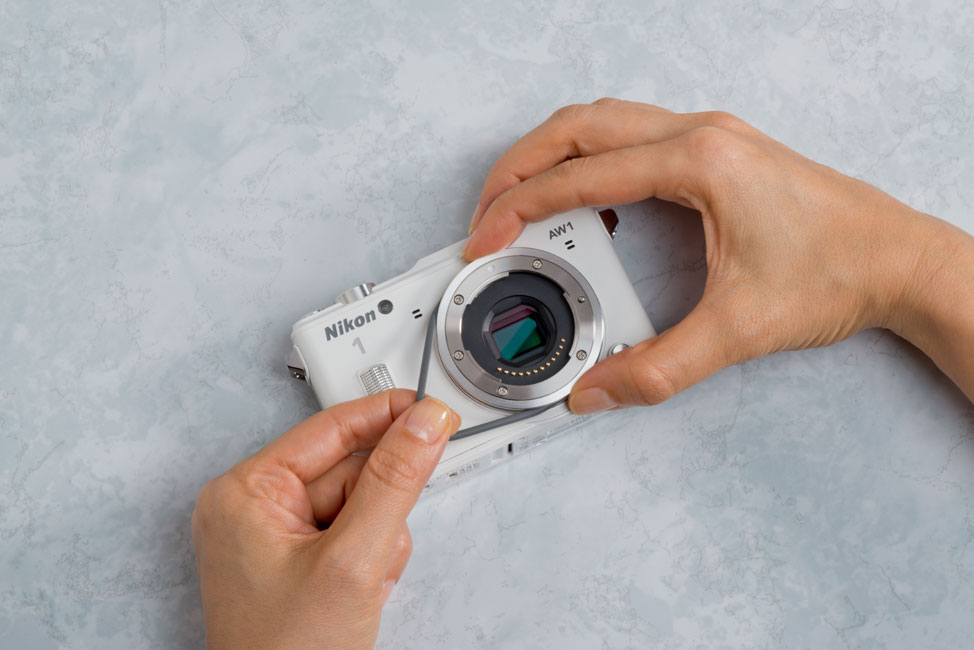
Carefully remove the O-ring to check it for wear or nicks. You can use either your fingers or an optional O-ring remover.
Check the O-ring for nicks or cracks, and thoroughly wash it in fresh water, drying it thoroughly.
Do not use benzene, thinner, alcohol, soap, neutral detergents, or other cleaning products, as these could damage or weaken the O-ring!
Check the integrity of the O-ring, looking for nicks or other signs of wear. The O-ring is what keeps the waterproof integrity of the camera, so it is important that it is cared for correctly.
Check the O-ring guide for foreign matter and use a blower or cotton swab to clean off any dirt. Be sure to remove any threads left behind from the cotton swab.
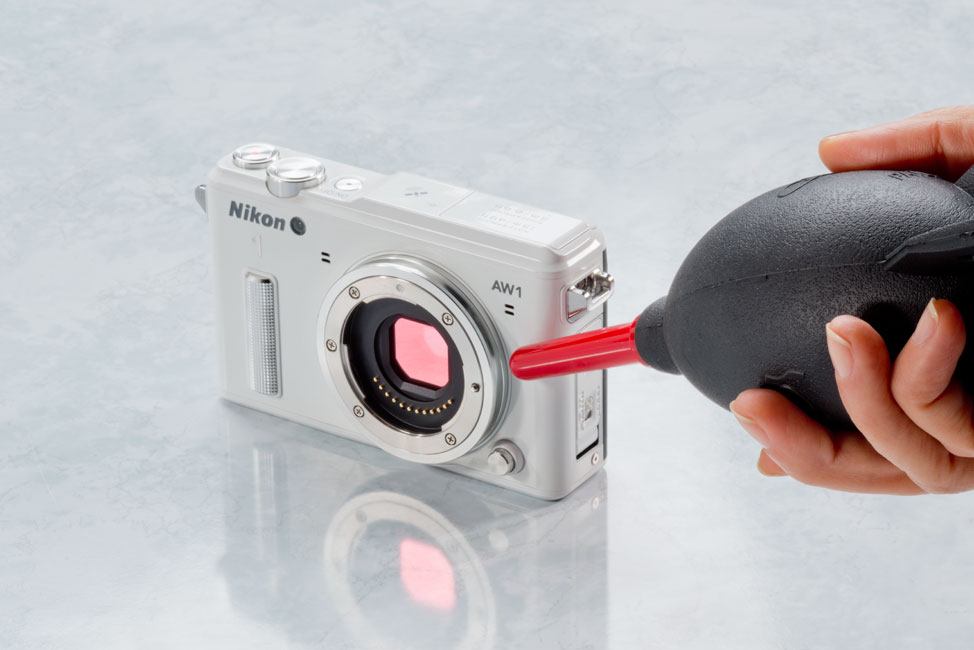
Using a bulb blower, carefully remove dust or foreign matter that may be adhering to the O-ring or the O-ring guide channel.
To grease the O-ring, use the silicon grease that came with the Nikon 1 AW1 or with the optional WP-G1000 silicon grease. Place a bead of the silicon grease in a plastic bag and use your fingers to spread the grease around inside the bag.
Do not use the lubricant that is used for COOLPIX or NIKONOS underwater camera’s O-rings!
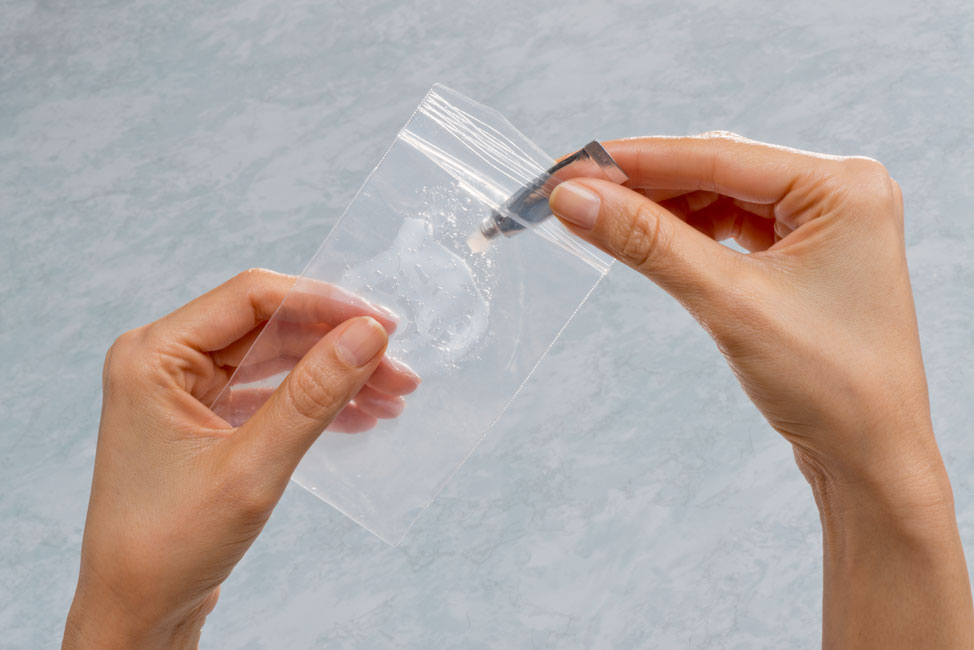
To grease the O-ring, use only the silicon grease that is designed for use with the camera. Place a small amount of grease in a baggie.
Then insert the O-ring in the bag and massage the bag to fully coat the O-ring. This prevents wear on the O-ring and makes it easier to attach and remove the waterproof lenses from the Nikon 1 AW1.
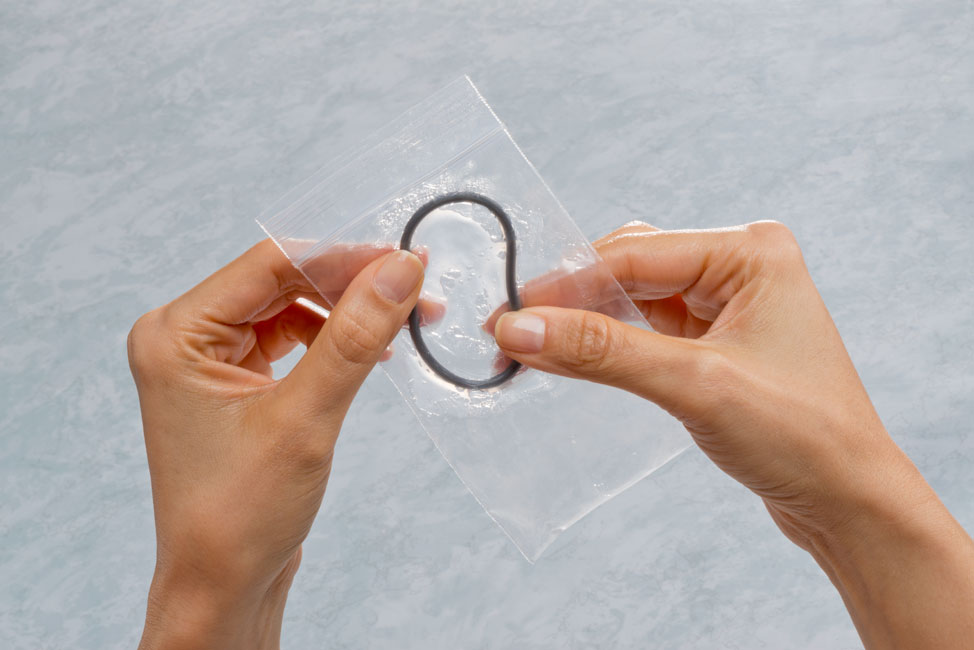
Once the silicon grease has been inserted into the baggie, place the O-ring inside and using your fingers, thoroughly cover the O-ring.
After making sure that the O-ring and the guide are free of foreign matter, place the O-ring so that it runs evenly at the same level, all the way around the O-ring guide. The O-ring should not be overly stretched, nor should it protrude from the camera body.
Carefully replace the O-ring, making sure that it sits correctly in the channel, and is not stretched or bulging.
|
|
Using the AW1 with a non-waterproof 1 NIKKOR lens
The Nikon 1 AW1 is a waterproof camera, when used with its waterproof lenses. You can also use the Nikon 1 AW1 with non-waterproof 1 NIKKOR lenses with the caveat that the camera will not be waterproof with a regular lens attached.
To use the Nikon 1 AW1 with a regular, non-waterproof 1 NIKKOR lens, you will have to protect the O-ring on the camera with the supplied O-ring protector.
The O-ring protector is supplied with the camera and should be kept on the body cap of the AW1 when it is not being used.
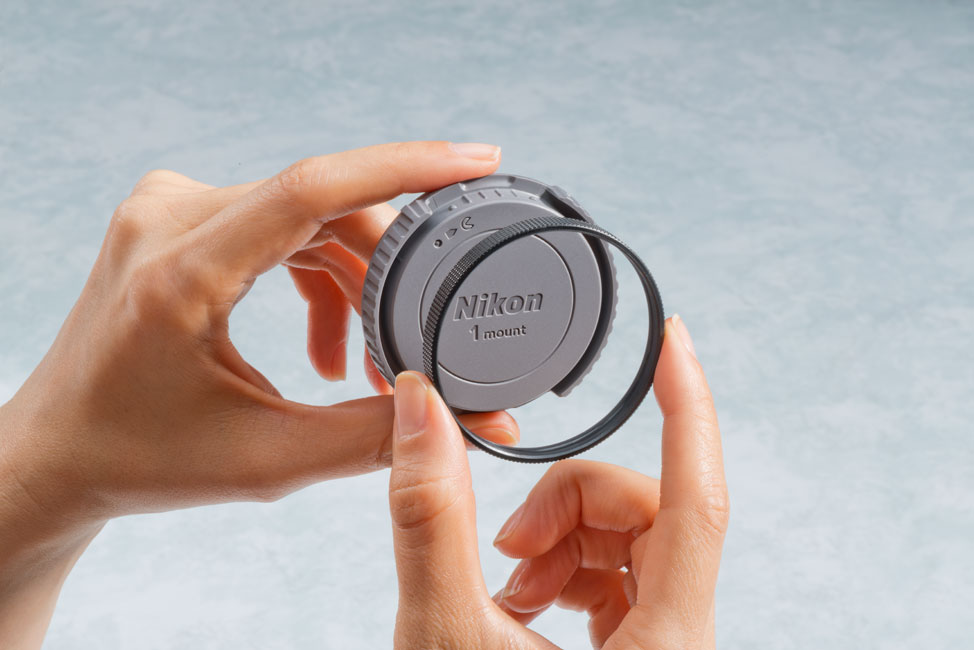
When you are using the Nikon 1 AW1 with a waterproof lens, place the O-ring protector on the body cap that came with the camera for safe keeping. This way, you always know where it is when you need it.
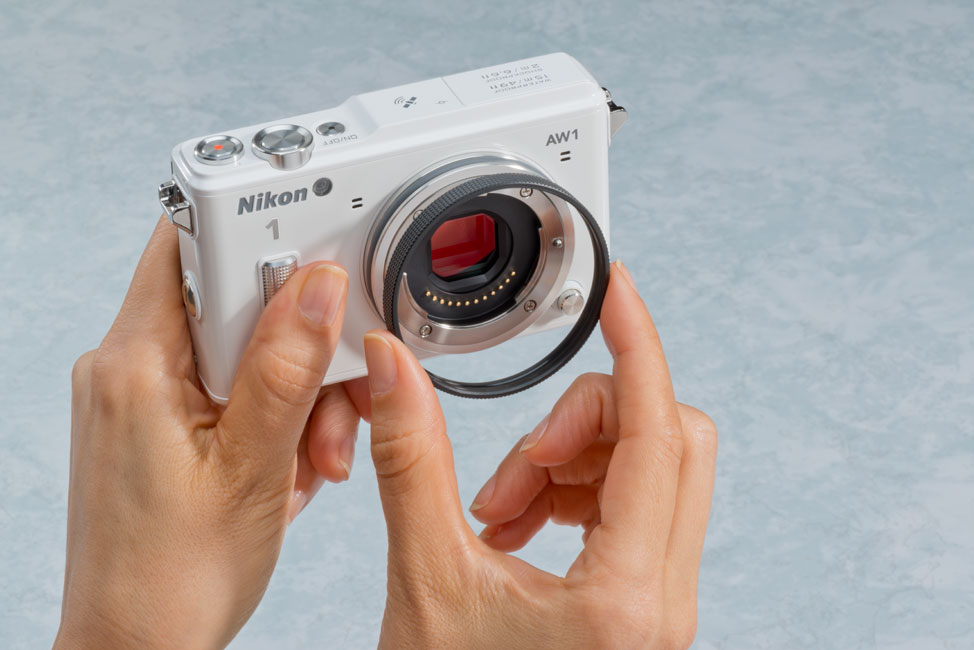
To place it on the camera, simply remove the O-ring protector from the body cap, and place it over the O-ring, on the AW1 camera body.
Because the O-ring ensures the waterproof integrity of the Nikon 1 AW1 and its waterproof lens, it is important to protect the O-ring when you are not using the camera with a waterproof lens. Place the O-ring protector over the O-ring before attaching a non-waterproof 1 NIKKOR lens on the camera.
With the O-ring protector in place, the O-ring is protected from dirt and damage, and you are now able to place a non-waterproof 1 NIKKOR lens on the camera. To do so, just make sure you’ve got the mounting mark on the lens and on the camera body lined up, and position the lens on the camera. Then rotate the lens until it clicks into place.
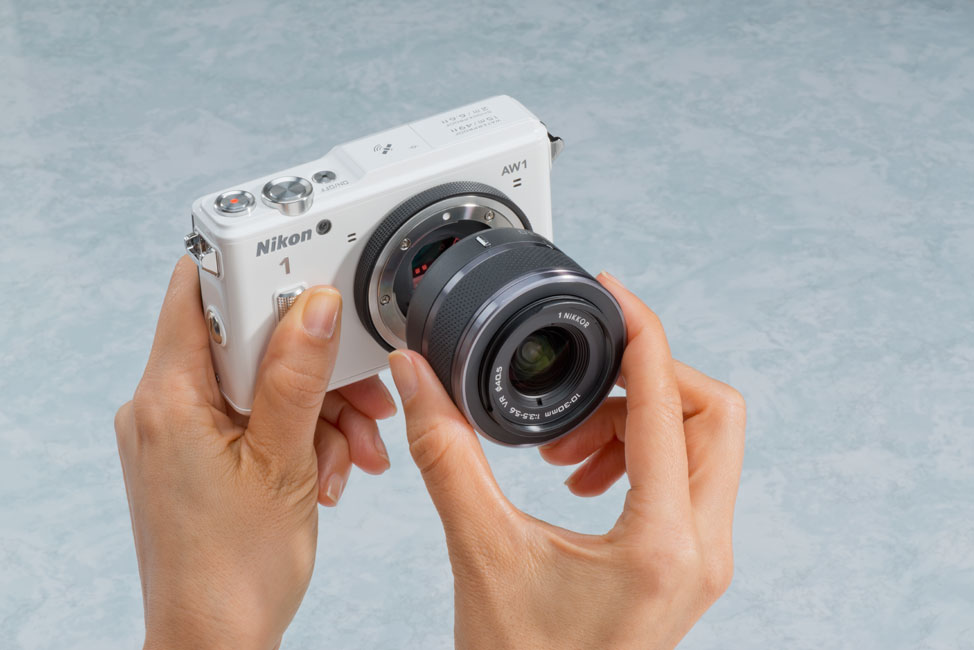
With the O-ring protector covering the O-ring, you can now attach a non-waterproof 1 NIKKOR lens to the Nikon 1 AW1 camera.
When you want to take off the non-waterproof 1 NIKKOR lens and go back to using a waterproof 1 NIKKOR lens, turn the camera off, and press and hold the lens release button while turning the lens. Then remove the O-ring protector and clean any foreign matter from the O-ring, and attach the waterproof lens to the AW1 camera.
You can also choose to put the camera’s body cap on the camera body, and not attach a lens at this time. To do so, attach the body cap to the AW1 and place the O-ring protector on the camera’s body cap.
For more detailed instructions, please consult the User’s Manual for the Nikon 1 AW1 waterproof camera.
TIPS: $
-
Use a high capacity memory card and fully charged battery to get the most use out of your Nikon 1 AW1 camera underwater. It is no fun to begin seeing great subjects to photograph and finding the battery is dead or the card full.
-
Before getting into the water, always double check that the battery compartment door and media card slot door are securely shut.
-
When traveling, make sure you take along extra silicon grease and an extra O-ring.
-
Replace the O-ring at least once a year, as preventative maintenance. Use only the Nikon O-ring specifically designed for the Nikon 1 AW1 waterproof digital camera not for waterproof COOLPIX or Nikonos cameras.


