Is Shooting RAW or JPEG better for you?
If you ask a photographer, “do you shoot RAW or JPEG?” be prepared for a very passionate answer, as the different file formats provide a very polarizing split between photographers. Just because people get very passionate about their choice doesn’t mean that there’s only one right answer, because just like most other topics in photography, each person has their own circumstances that influence choices. Whether you should shoot RAW or JPEG (or both) can depend on several factors.
Let’s take a look at what JPEG and RAW files are before we talk about why each one should be used. JPEGs are a standardized format that are designed to be a smaller file size that can be read by all computers, smartphones, tablets and other devices without the need for specialized software. This makes it very easy to share but it also comes with some downsides:
Much of the information encoded in a JPEG is baked-in, meaning that any edits done to the file are destructive and there will be a slight loss in quality.
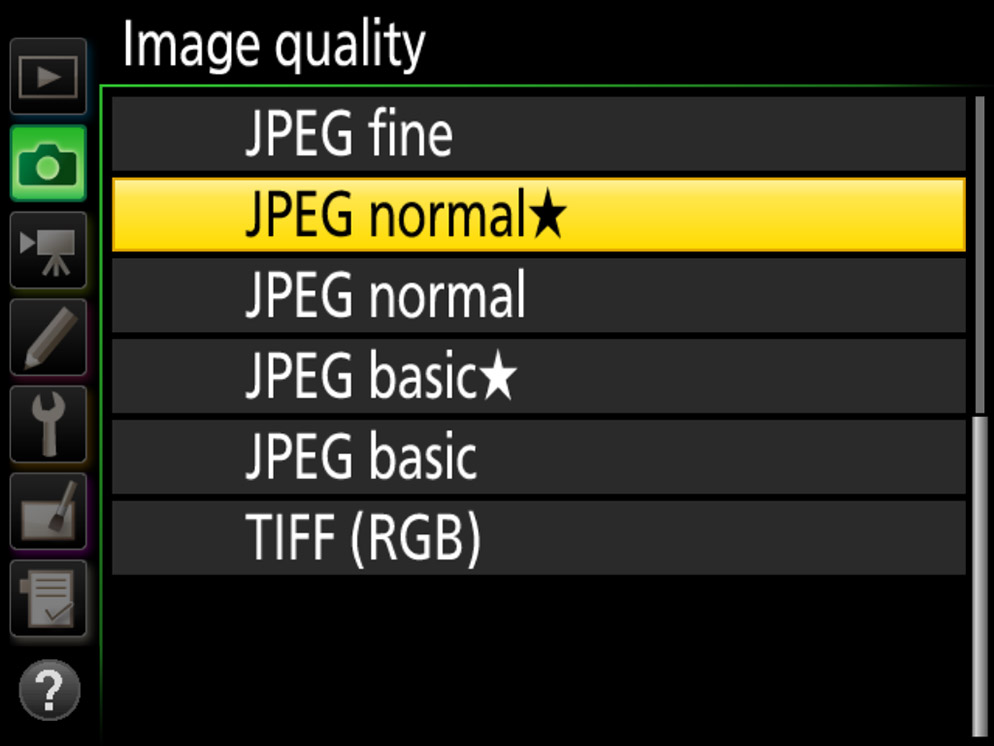
Image quality options with a star next to them use compression intended to ensure maximum quality; the size of the files varies with the scene. Options without a star use a type of compression designed to produce smaller files; files tend to be roughly the same size regardless of the scene recorded. You can actually change the compression settings of a JPEG by selecting whether you want it to give priority to image quality or file size in the camera.
A RAW photo on the other hand contains all the image information captured by the camera’s sensor, along with all the metadata (the camera’s identification and its settings, the lens used, and much more). Due to all of that extra data, the file size is much larger than a JPEG, and because the data is in a “raw” form, specific photo-centric software is required to edit the photo. That means more time will be spent on post-production since you must edit your files but it also means you can make many different edits without any loss in quality thanks to the non-destructive nature of the file.
What software can you use to edit the RAW files? You can either use Nikon’s free Capture NX-D software which is able to see and keep all the same settings that you have set in the camera (such as Active D-Lighting, Picture Control, Vignette Control) or you can use third party software, keeping in mind that third party software cannot read much of the camera settings, giving you a little bit more work to do on your photos since you’re starting from scratch.
A JPEG is smaller and can be shared right out of the camera while a RAW file is much larger and must be edited before it can be shared. That doesn’t sound like a hard choice, the JPEG sounds much easier to deal with. While that’s true from an “ease-of-use” standpoint, more serious photographers who want greater editing flexibility will find a RAW file is worth the extra editing time.
Let’s look at a little bit of math to explain a few ways why you can achieve higher overall quality with a RAW file thanks to the technical reason—bit depth. A JPEG is an 8-bit file, which means each channel (red, green and blue) in a pixel can record up to 256 levels of luminosity. By multiplying each channel together (256 x 256 x 256) you get a theoretical maximum color depth of 16,777,216. This means that an 8-bit file has the ability to show up to 16.78 million color tones at each pixel.
On higher-end Nikon cameras you can select whether you want the RAW file to be recorded either as a 12- or 14-bit file, which will give you an incredible 1.07 billion or 68.68 billion possible color tones respectively.
Why and When to shoot at the highest 14-bit quality is a topic for another article but the important thing to take away from these numbers is not that more colors are possible when shooting at a higher bit-depth, but that tonal gradation (the steps in between colors) are much finer.
Ok, so how does all this math affect your final image? Have you ever seen an image of a blue sky with visible banding?
This is called posterization and chances are that the original photo was an 8-bit JPEG and it was heavily edited, so the lack of tonal range (yes, I know, it sounds strange saying that 16 million is a small tonal range) has caused the banding. If the photo was taken as a RAW file, the larger tonal gradation would mean a much smoother color transition in the sky.
On top of more color tones being recorded, one of the main benefits of a larger bit depth is the retention of a larger dynamic range, which can greatly affect how much latitude you have when editing your photos. If you always get the exposure perfect than a larger latitude may not be of much benefit to you, but if you want to rescue a poorly exposed photo, or if you frequently play with the highlight and shadow regions of your photos then it could be very valuable.
Benefits of RAW over JPEG
For important shoots, I generally shoot RAW in case I need to make major adjustments to the photo afterwards. As an example, on a recent trip to Botswana, I was photographing some birds against a backlit sky when we were startled by an elephant that came out of the bushes not 15 feet from our truck. Without thinking I turned and started shooting the elephant while the camera’s exposure was still set to over-expose the backlit subject.
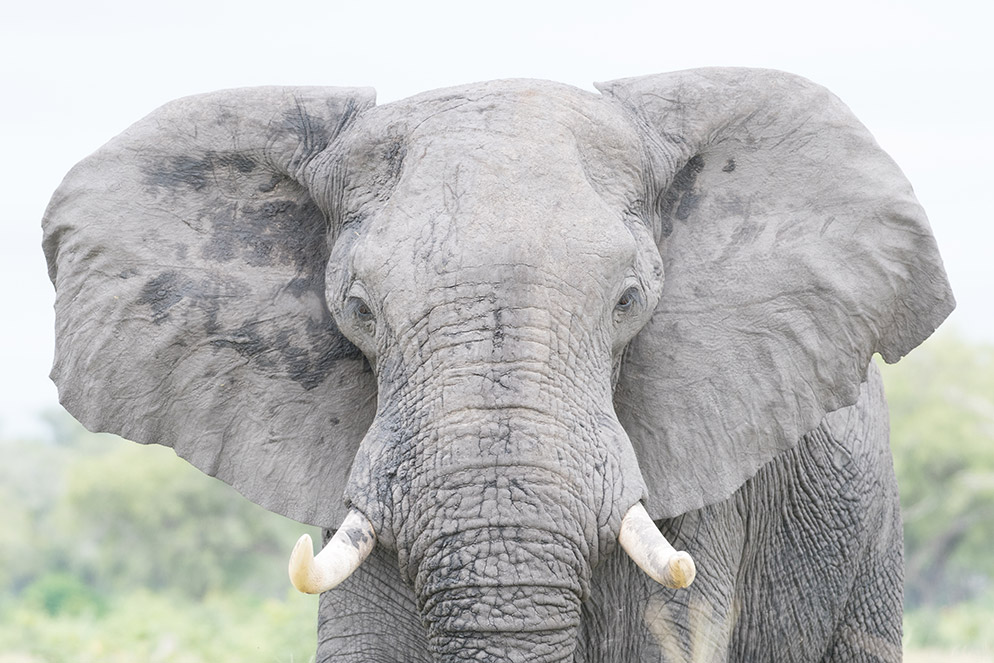
The original photo was mistakenly heavily overexposed.
As you can imagine when I finally reviewed my images a few minutes later I realized what I had done but it was too late to go back and recreate that moment. If I had shot this as a JPEG, this is the furthest I could have pushed the file because of the smaller dynamic range when editing the file.
If the photo had been taken as a JPEG and it was tried to be recovered, this is the extent that it could be “fixed”.
Notice that the color, contrast and saturation in the entire photo is quite low, and it leaves the photo lacking the punch that you would expect and hope from this amazing subject.
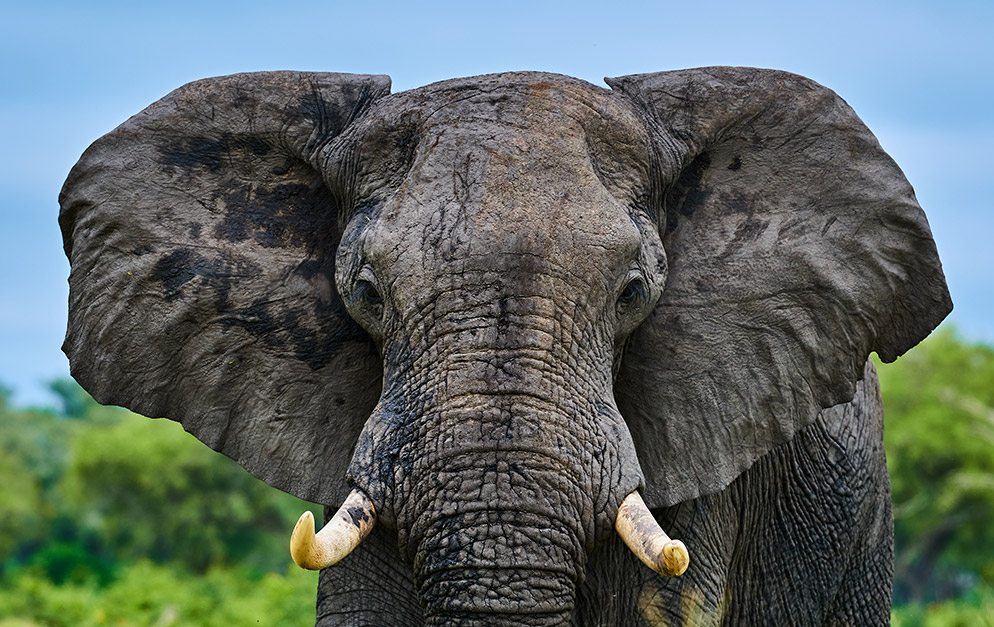
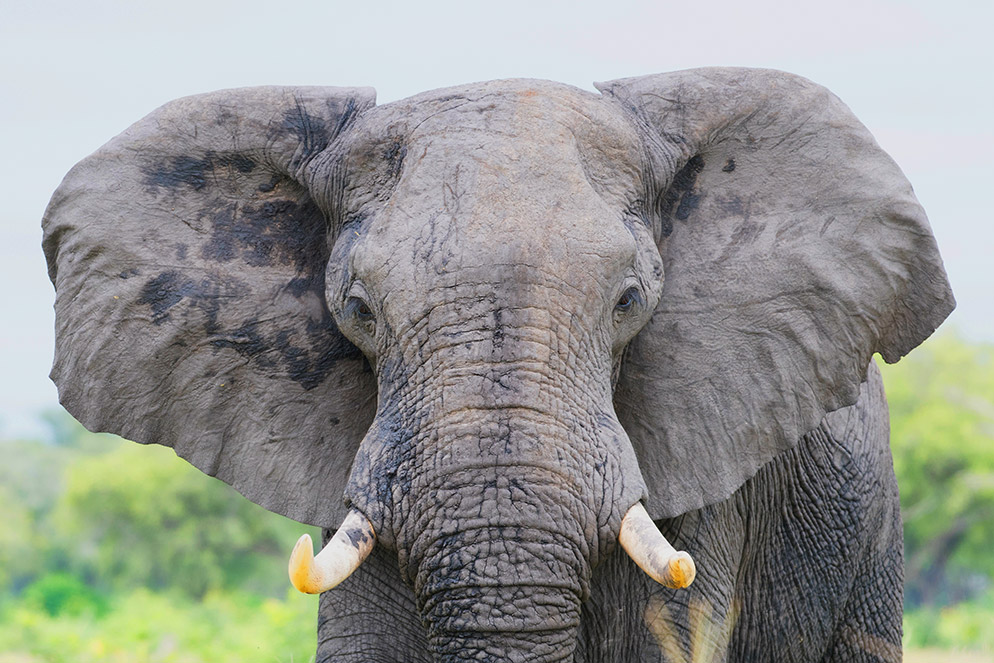
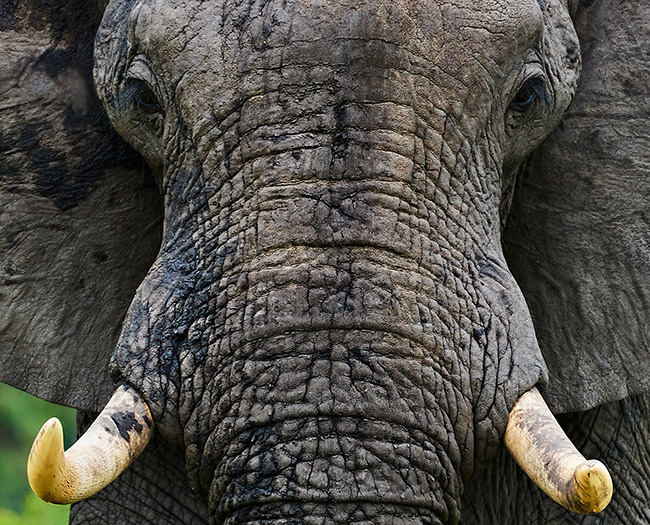
You really start to get a sense of how much more dynamic range is available in a RAW file when you look at the edited RAW image. Notice the amazing blue sky and the amount of detail and contrast in the wrinkles of the elephant’s skin.
The retention of a larger dynamic range allowed the RAW file to be heavily manipulated, and even though it was overexposed at the time of shooting, it was able to be “saved” in post-production.
A 75% crop of the above corrected RAW file.
So far, you’ve seen a couple examples of why shooting RAW is better:
-
Larger tonal gradation helps keep issues like posterization away
-
A larger retained dynamic range gives you more latitude while editing
But for the casual photographer who doesn’t want to be forced into editing every single photo they take, is shooting RAW always the best choice? Not always, no. Not only do RAW files require more time editing, but they take up more space on the memory card and they will fill up your camera’s buffer faster too. So, you’ll be forced to shoot smaller continuous bursts and you’ll need larger memory cards as well.
When you might be taking a lot of shots in a small time period, and the lighting conditions aren’t all that tricky, shooting JPEGs are a safe bet that will save you a lot of time and energy. The one key thing that all JPEG shooters should be aware of, is knowing which Picture Control you’ve selected on your camera. In-depth information about Picture Controls can be found in other articles on our website, but essentially, it’s controlling the look of your photo by changing the contrast, saturation and sharpness based on the scene you’re shooting and the look you want.
A Third Option: RAW + JPEG
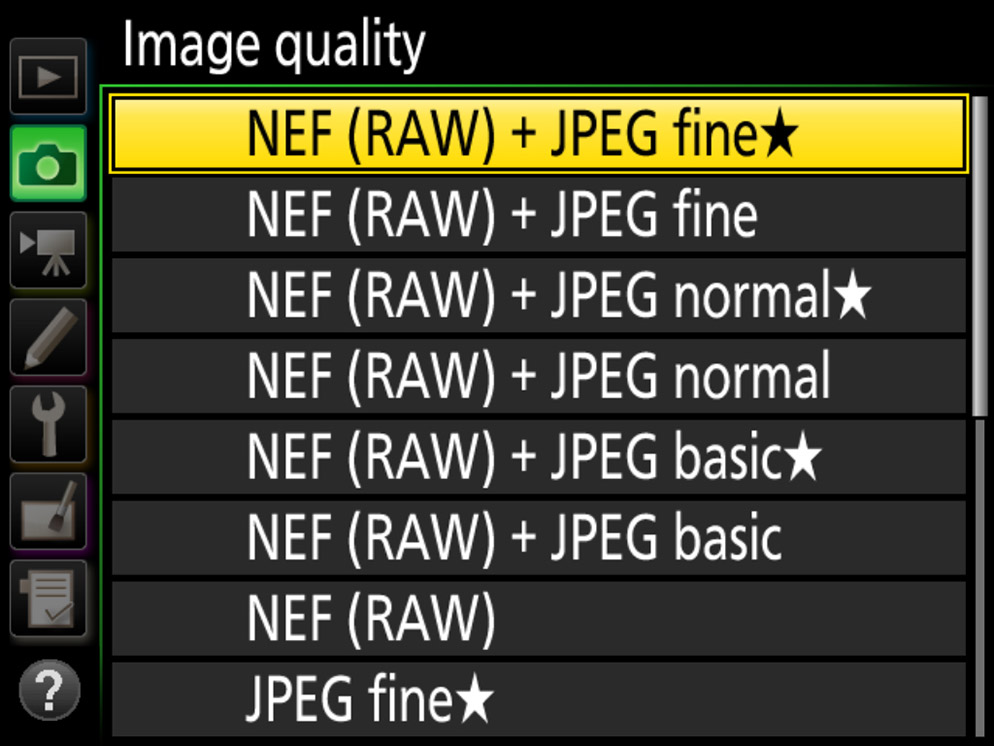
There is a third option—RAW + JPEG—that tries to give you the best of both worlds by letting you shoot both RAW and JPEG at the exact same time. If you’ve selected the right Picture Control and you’ve properly exposed the photo, then the JPEG should be all that you need but for those times when some editing is required you have the RAW file available.
There’s not a single right answer when it comes to whether you shoot RAW or JPEG but it depends on what you’re shooting and the workflow you’re comfortable with. If you’ve only ever shot JPEG, maybe try shooting RAW for a couple days and see what it’s like having to edit your photos and seeing how much more control you have in the process. Conversely, if you only ever shoot RAW, think back and see if you really need to edit every single photo. If not, maybe try RAW + JPEG and see how good of a job the camera’s internal EXPEED processor does when you’ve selected the right Picture Control and exposure combination. Either way, try and think outside of what you normally do and try something new with your camera.
Sharing via SnapBridge
Nearly every Nikon camera now has built-in Wi-Fi and/or Bluetooth making it easier than ever for everyone to instantly share high-quality photos from their Nikon camera to their compatible smart device so they are easy to share on Facebook, Instagram, or other social media platforms.
Whether you shoot RAW (NEF) and convert to JPEG in the camera or shoot JPEG files to begin with, you can use SnapBridge to share those images from the camera to your smart device and then with the world.

